The Dashboards menu item allows you to configure additional dashboards for your Bosch IoT Insights project in order to display collected data.
Dashboards are project-specific and consist of widgets. For further details about widgets, refer to Working with widgets.
Table of contents:
Accessing Dashboards
Proceed as follows
- Navigate to Admin > Dashboards on the side navigation.
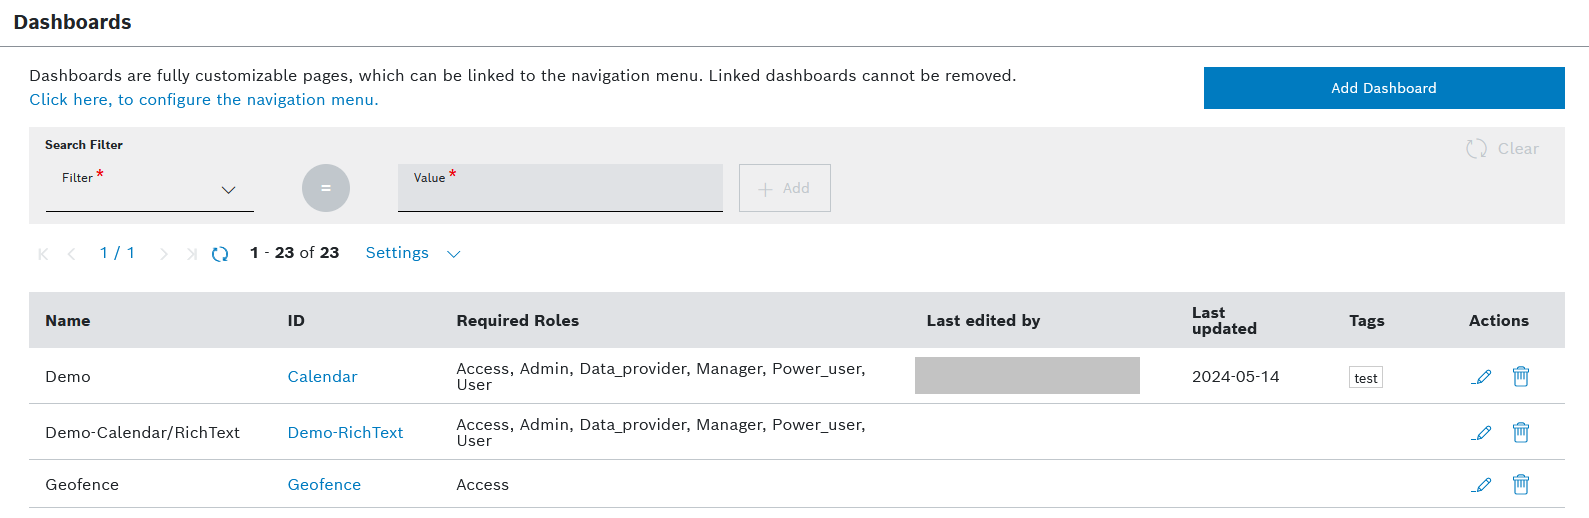
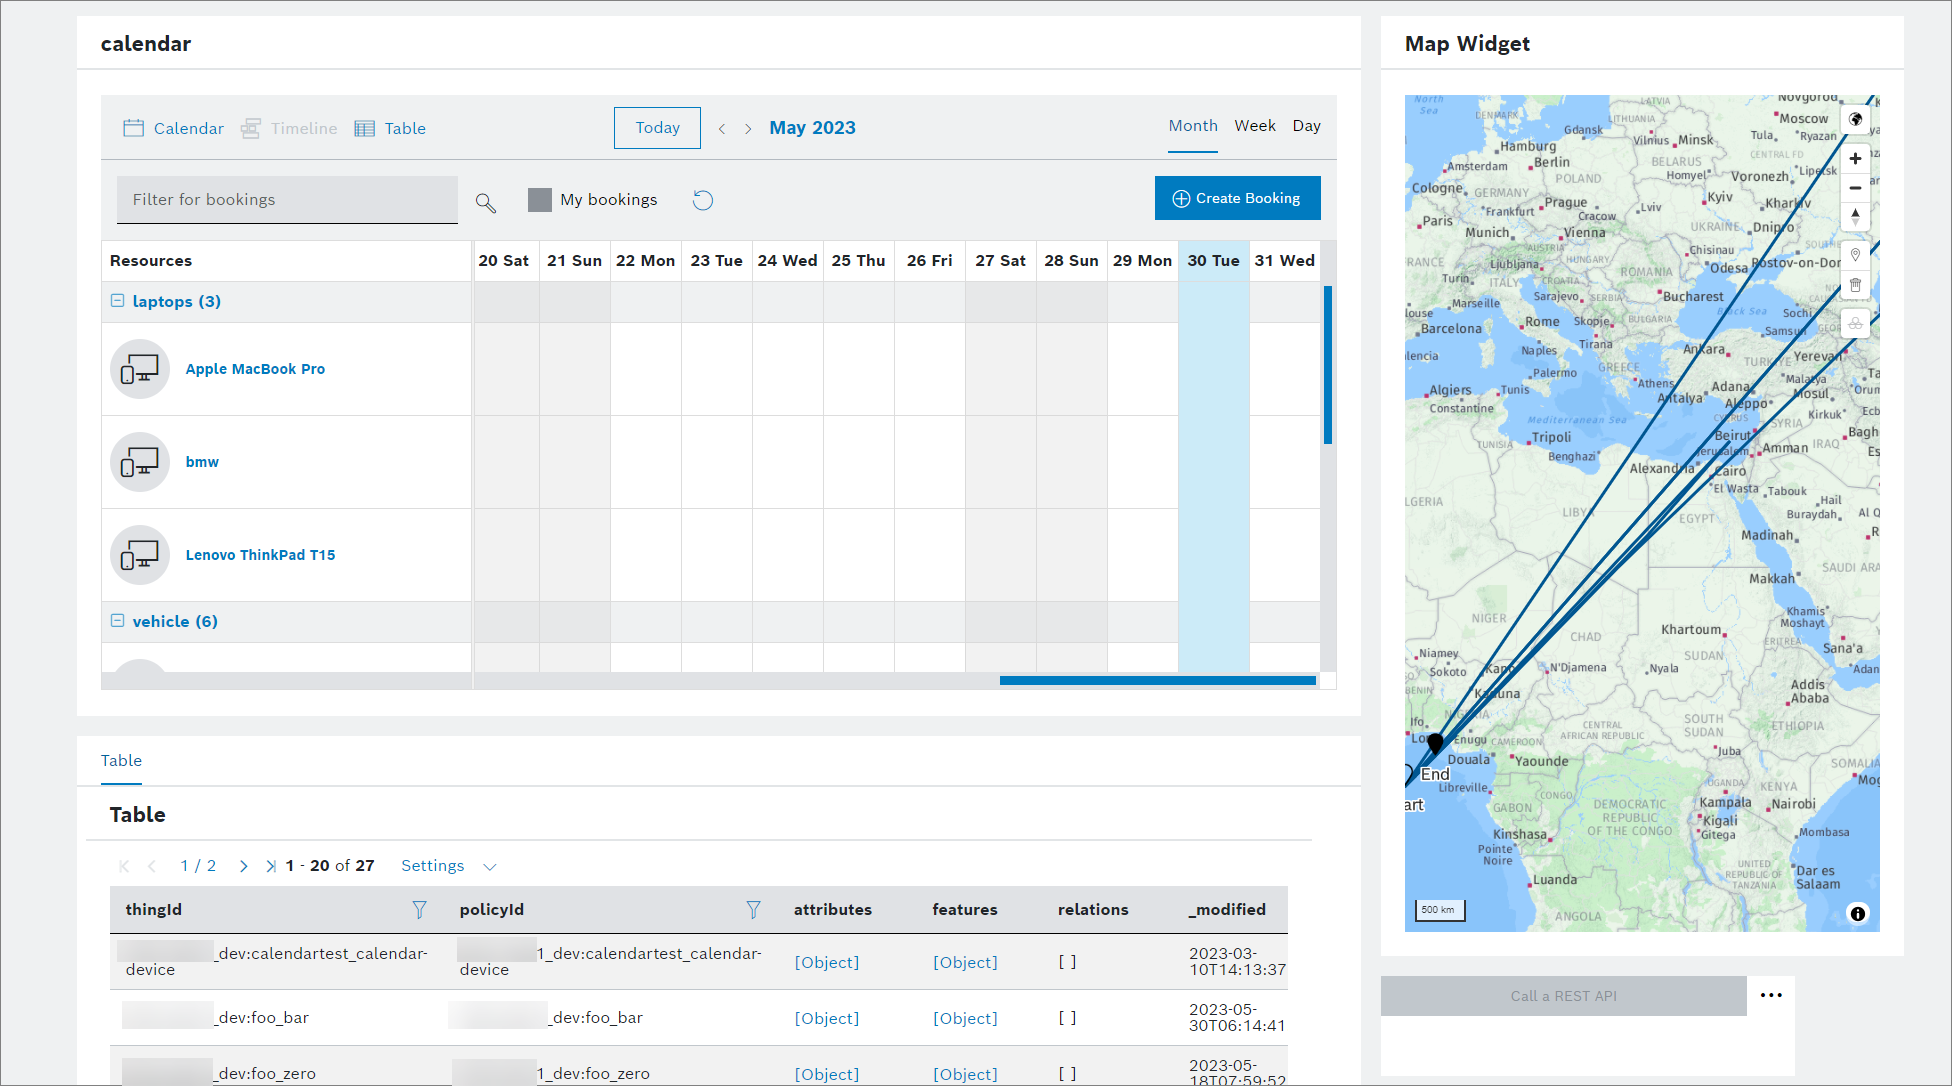
→ The Dashboards configuration page is displayed and shows a list of the existing dashboards, as well as the main configuration actions - adding a dashboard, editing a dashboard, and deleting a dashboard.
→ The list of dashboards offers a search filter, pagination, sorting, as well as the possibility to remove and restore columns.
Prerequisites
To execute the following actions, you have to be assigned to the Manager role or higher.
Adding a dashboard
To create a new dashboard, follow these steps:
- Click the Add Dashboard button.
→ The Update Project's Dashboards dialog is displayed, as on the screenshot below.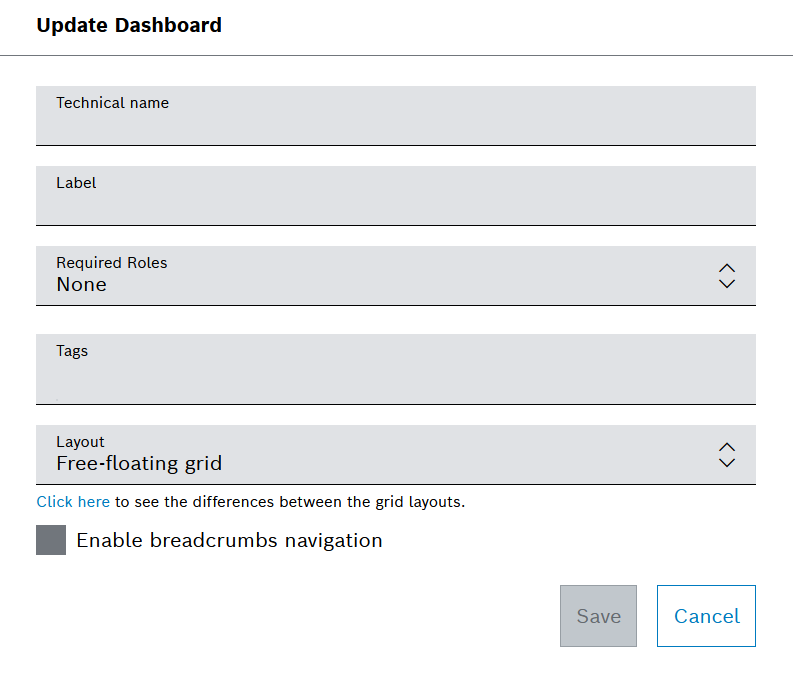
- Enter a Technical Name for the dashboard.
- Enter a Label.
- In the Required Roles drop-down list, select one or multiple roles of users who are allowed to configure this dashboard.
- In the Tags field, enter one or several tags to categorize your dashboard.
You can search through the already existing tags or create a new one. There is also an autocomplete functionality. In the Layout drop-down list, select whether the dashboard should be displayed in a column-based view, free-floating grid or compact grid.
If you select Column-based, the size of the widgets can be set on the configuration page.
If you select Free-floating grid, the widgets can be arranged as desired.
If you select Compact grid, there will be no horizontal space between widgets.
You can also convert existing dashboards to the grid-based layout. Dashboards with the grid-based layout cannot be converted back to the column-based layout.
For more information on how to work with the grid-based layout, refer to Arranging widgets in the grid-based layout.
- Optionally, activate the checkbox for Enable breadcrumb navigation, which will display the different levels in case of nested dashboards.
This is described in more detail in Nesting a dashboard below.
Click the Save button.
→ The dashboard is added to the dashboard list.
Editing a dashboard
To edit a dashboard:
- Click the Edit icon on the right of the respective dashboard on the list of dashboards.
→ The Update Project's Dashboards dialog is displayed, where you can edit the relevant fields and Save your changes.
![]()
Removing a dashboard
To remove a dashboard:
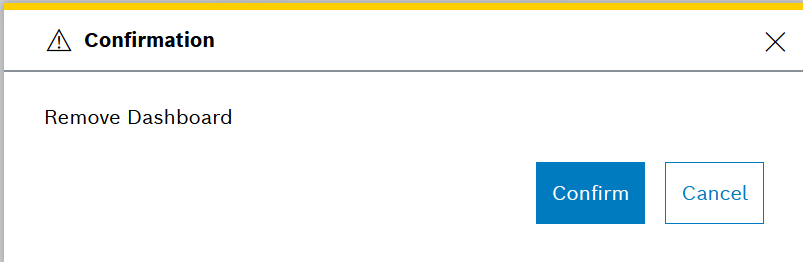
- Click the Delete icon on the right of the respective dashboard on the list of dashboards, as on the screenshot above.
→ This is not an immediate action and you will be asked for confirmation. - Click Confirm to delete the dashboard.
Filtering dashboards
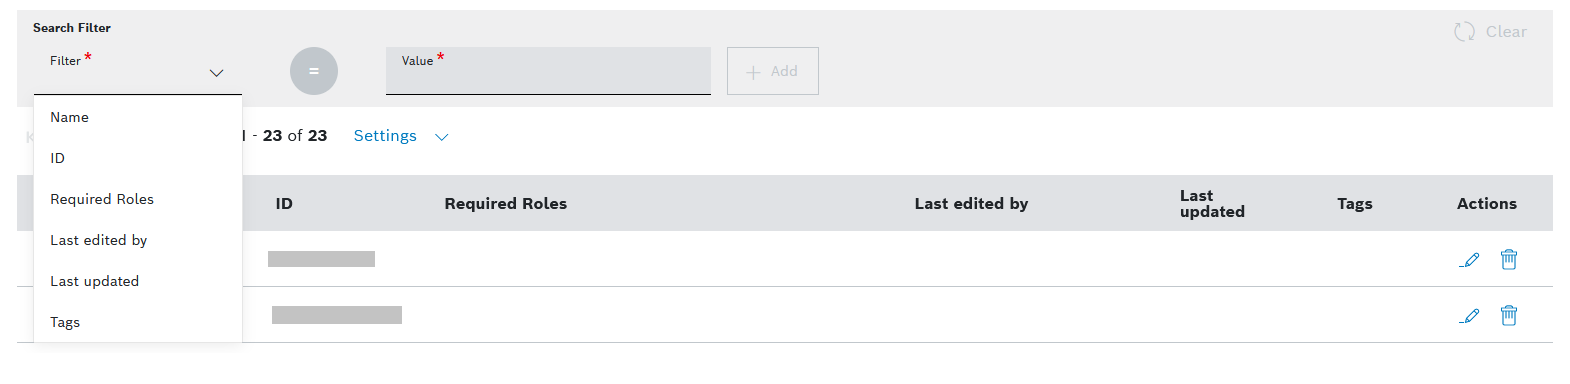
To filter the list of dashboards, use the Search Filter pane on top of the list.
Proceed as follows:
- Expand the Filter drop-down menu.
- Select one of the available criteria, namely:
- Name
- ID
- Required Roles
- Last edited by
- Last updated
- Tags
- Name
- In the Value field, enter a value.
- Click the + Add button.
→ The added filter is displayed as a chip. - Add as many filters as needed, as described in the previous steps.
→ The entered values are treated with an AND logic. - Apply the added filter(s) by clicking the Search button on the right. This button is available only after a filter has been added.
→ The list of dashboards is filtered accordingly. - Click the x on any filter chip that you want to remove.
→ The filter is removed and will not be applied the next time the Search button is clicked. - Click the
 Clear icon to remove all filters applied to the list.
→ The list displays all dashboards.
Adjusting the list view
Pagination
The list of dashboards displays the results in pages, with a default value of 25 entries per page.
Proceed as follows:
- Use the
 and
and  icons to jump to either the first page or the last page of displayed dashboards.
 - Use the
 and
and  icons to go to the previous page or to the next page.
 - Adjust the number of results per page as follows:
- Expand the Settings drop-down menu.
- In the Limit section, select the number of items to be displayed on one page.
→ The changes to the list view are applied immediately.
Sorting
Proceed as follows:
- To sort the results on the list, click the title of your column of interest.
- If needed, click again to change the order from ascending to descending and vice versa.
→ The displayed dashboards are sorted accordingly.
Removing and restoring columns on the list
Proceed as follows:
- Expand the Settings drop-down menu.
→ All columns are activated by default. - Deactivate a column to remove it from the list.
→ The changes to the list view are applied immediately. - Activate a column in order to restore it to the list.
→ The changes to the list view are applied immediately.
Refreshing the list
Proceed as follows:
- Use the icon to refresh the list of dashboards.
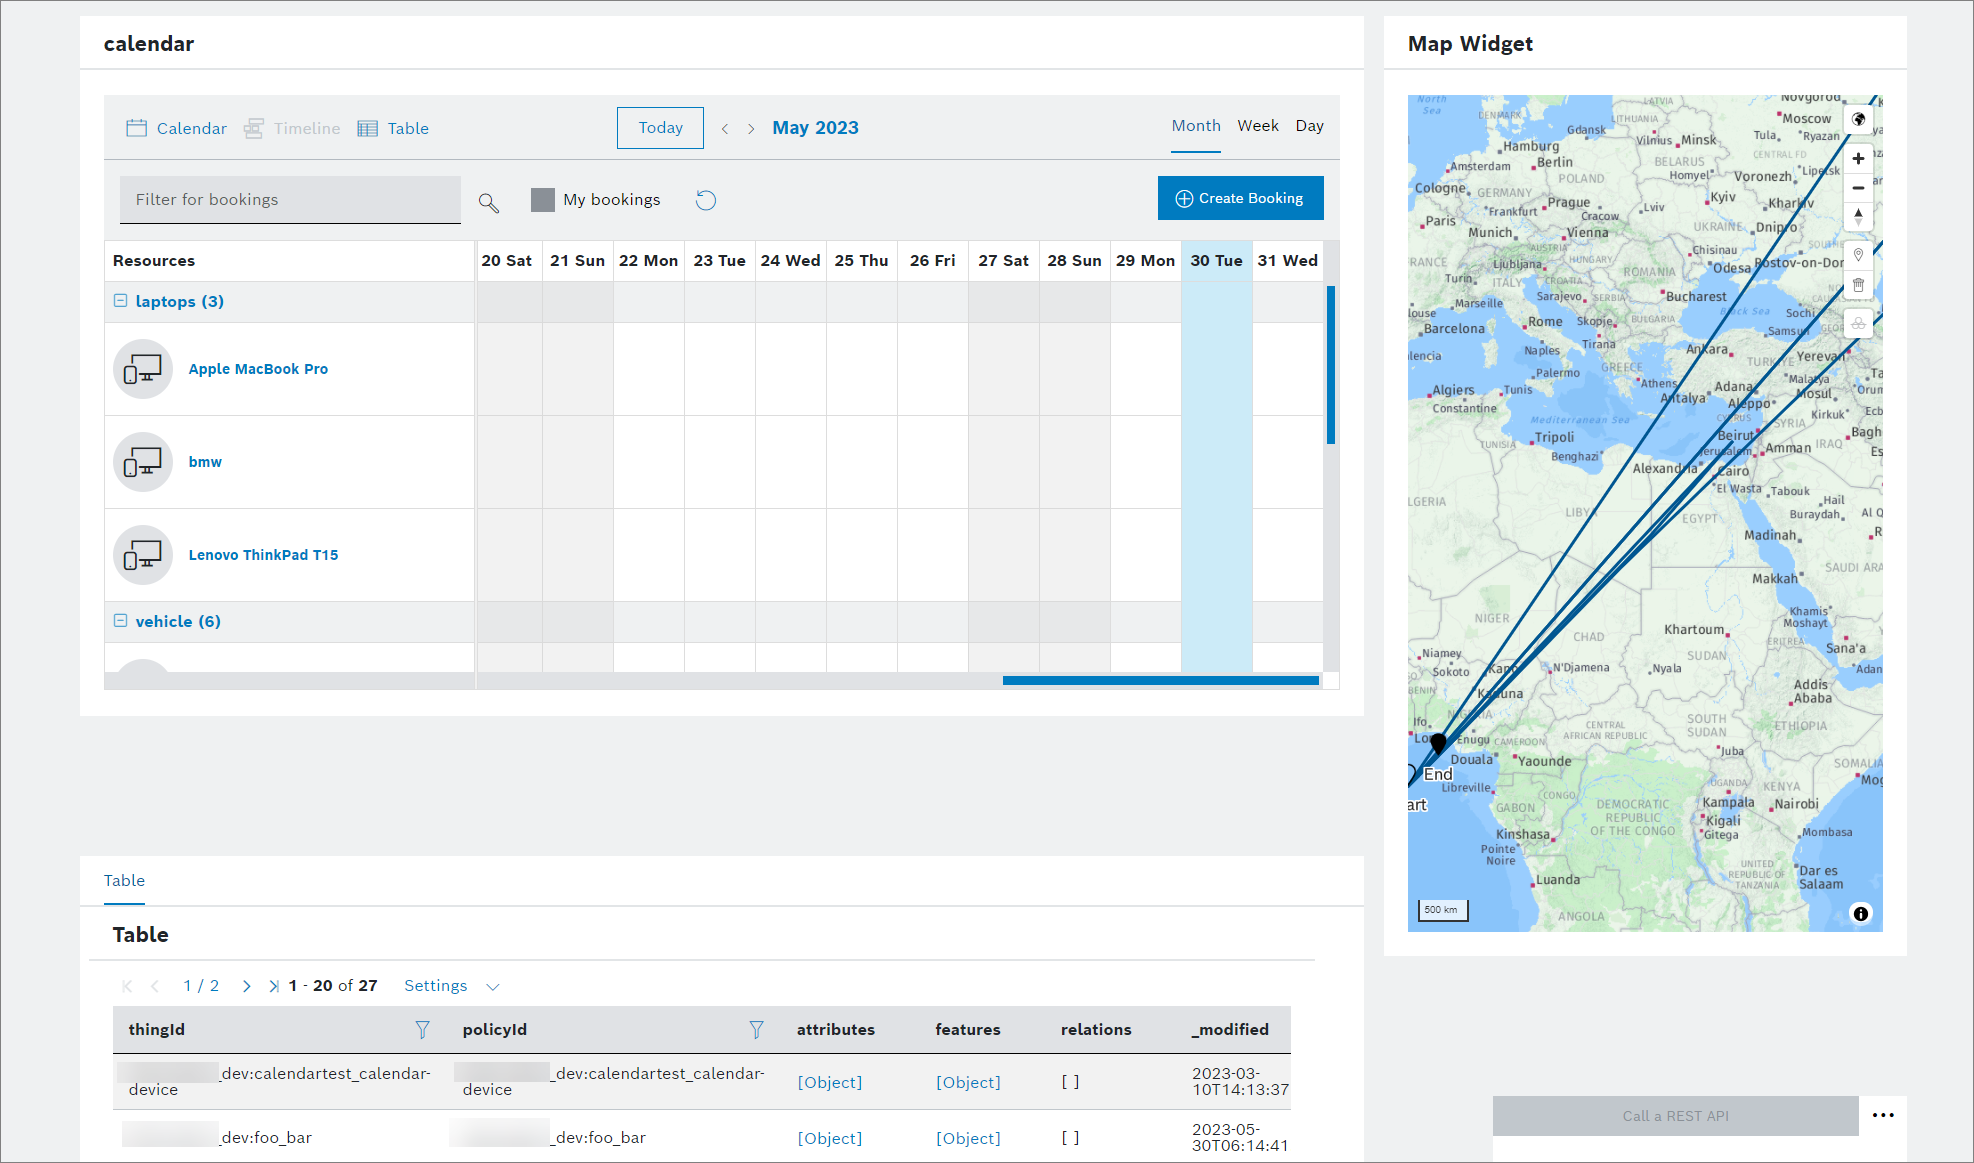
Managing dashboard widgets
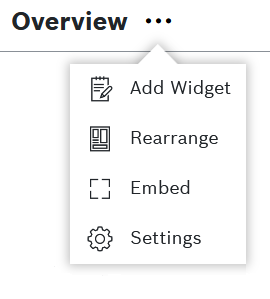
Once you have created a dashboard, select it on the list of dashboards and then click the three dots next to the dashboard name.
On the menu that opens, click Add Widget to add widgets to the dashboard or click Rearrange to rearrange the widgets on the dashboard.
The Settings option on this menu will bring you to the Admin landing page.
→ For further details, refer to Working with widgets.
Embedding a dashboard
Dashboards can be embedded in external websites with iFrame codes.
Click the Embed action on the menu which opens from the three dots next to the dashboard name (see screenshot above).
→ Follow the steps as described in Embedding a dashboard.
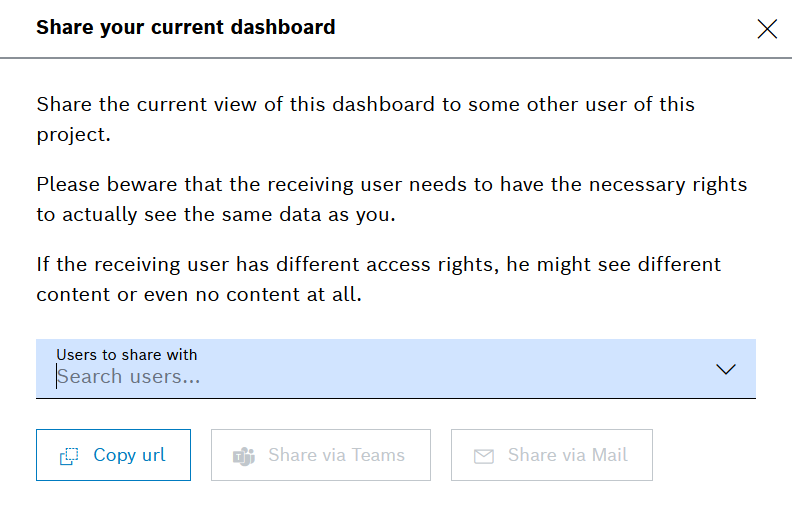
Sharing a dashboard
You can share your dashboards with other project members by copying and sending them the dashboard's url.
When a dashboard has a filter widget on it, you can also conveniently use the ![]() icon on the filter's header bar. Then, select the users from the drop-down list and choose a convenient sharing option. However, keep in mind that the roles of the users will affect the way they see the shared content.
icon on the filter's header bar. Then, select the users from the drop-down list and choose a convenient sharing option. However, keep in mind that the roles of the users will affect the way they see the shared content.
Adding a Dashboard menu item to the main menu
If you need to add one or multiple dashboards to the main menu:
- Refer to Dashboards to understand how the custom menu works.
- Add one or multiple entries as described in Dashboards, for example:
- Add one Page type entry with Dashboard content type for each dashboard that you would like to link.
- Add one Node type entry to group these Page type entries.
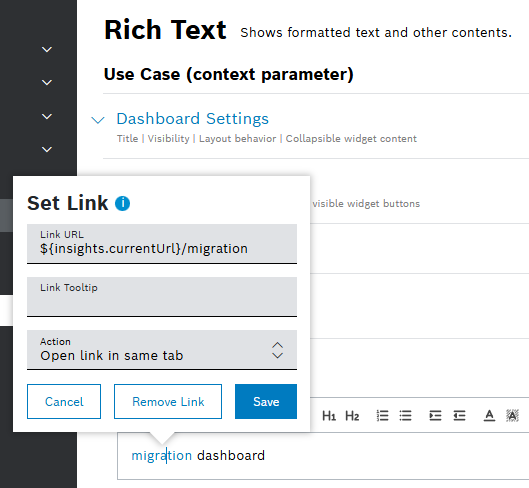
Nesting a dashboard
Your dashboard may include a link to another dashboard, which in turn may include a link to another dashboard.
We refer to this approach as dashboard nesting. It can be implemented in several ways, for example by means of an action button on the dashboard, a link panel widget, a rich text widget, etc.
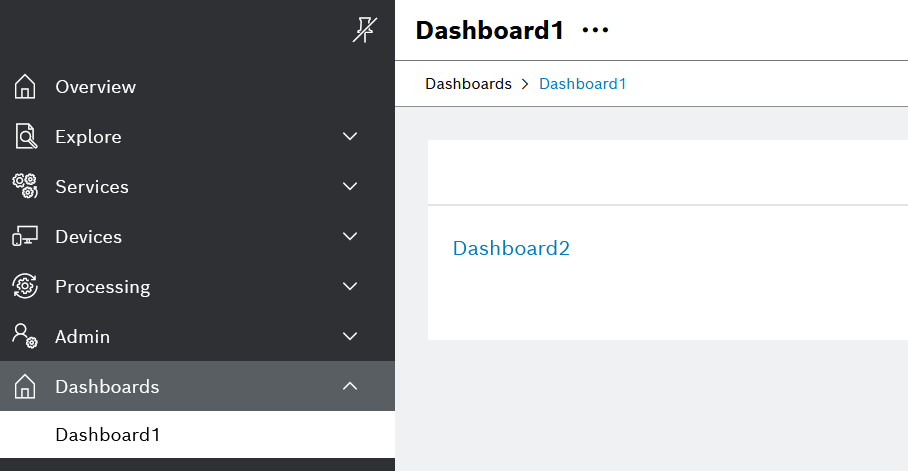
We support up to three nesting levels, which can be easily navigated through thanks to the breadcrumb navigation.
The following structure has to be applied for the breadcrumb navigation to function properly:
.../views/dashboards/{dashboard1}/{dashboard2}/{dashboard3}.
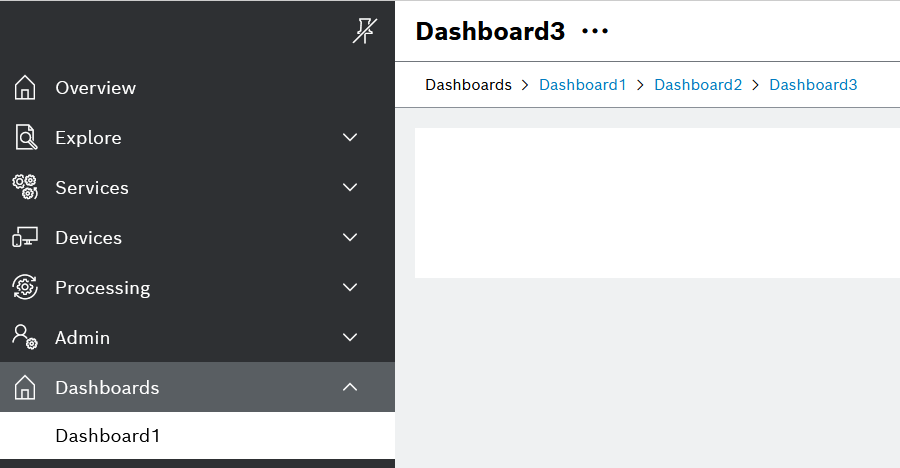
The system always loads the last dashboard from the link URL, which in the example above would be dashboard3. However, on the left navigation it is always the main dashboard that is highlighted, which in the example above would be dashboard1.
A fourth level of depth is not supported. For example, with a URL as below, the UI will display an Error message:
.../views/dashboards/{dashboard1}/{dashboard2}/{dashboard3}/{dashboard4}
Navigation context parameter currentUrl
The ${insights.currentUrl} placeholder provides a convenient way to construct links related to the current URL, which results in correct breadcrumb hierarchy.