You can change the name of a device type, add the German name of a device type, upload a default icon, and define the properties that are clustered in so-called information blocks.
This chapter details the following topics:
Prerequisites
- You are assigned to the Manager role or higher.
You have created a device type and the device type settings are displayed.
If you have paused the configuration of the created device type, click the Settings icon
 within the desired device type frame to configure the device type.
Changing the name of a device type
The name of a device type can be changed and, optionally, the German equivalent added.
Proceed as follows
- In the Label pane, click the name and make your changes.
- In the Label pane, click the EN drop-down list and select Add DE: German to add the German equivalent for the device type.
Managing calendar bookings
You can decide whether devices of this device type can be booked in the calendar.
Proceed as follows
- In the Devices can be booked in Calendar drop-down list, select one of the following options:
- Bookable: Devices of the devices type can be booked in the calendar.
- Not bookable: Devices of the device type cannot be booked in the calendar.
- Mandatory: Devices have to be booked in the calendar.
Setting the visibility of a device type
You can decide to which user roles the device type is visible.
Proceed as follows
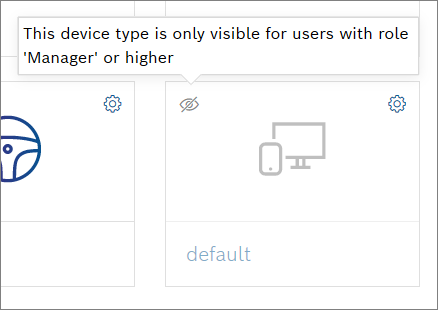
- Activate/deactivate the Visible for User (always visible for role 'Manager' and higher) checkbox to configure the visibility.
The device type is grayed out for users that do not have the role Manager or higher if the checkbox was deactivated:
Uploading a default icon
You can select a new default icon for your device type. The icon will be applied to all devices linked to this device type.
Proceed as follows
- Click the Select Icon button to change the default icon.
→ A list of possible icons is displayed. - Select an icon from the list.
→ The icon is set as the new default icon.
To reset the default icon, click the Reset to Default button.
Adding information blocks
Information blocks cluster the properties of a device type. The following information blocks can be added:
- Details
To add more information to the device. Similar to the General information block that is always added by default and cannot be removed. - Images
To add an image of the device. - Attachments
To add files that contain more information on the device, e.g. user manuals. - Hyperlinks
To add website links or file links that may contain important information on the device. - Bookings
To add bookings of a device to be displayed in the calendar. This information block is only available if the Devices can be booked in Calendar checkbox is activated. - Device links information block
To link devices to the device type. - Notes
To add information on a device that does not fit into the other information blocks, e.g., advice, warnings, status updates. - JSON data information block
To display generic data from Device Management as a JSON data object if the data type is unknown to Bosch IoT Insights. - Thing attributes information block
The attributes of the device that are stored in Device Management, refer to the Attributes section in the Eclipse Ditto documentation. - Software Inventory information block
To add the software version of a device. - Action Buttons
To define custom triggers for a device. - Geolocation
To show the exact location of a device with latitude, longitude, and altitude. - Geofence
To show in which zone a device may move. - Booking Color
To apply the same color to all bookings of the respective device.
For more information on how to configure these information blocks, refer to the subchapters of Managing information blocks.
These information blocks can be marked as mandatory so that they are added automatically when a device of that device type is created.
By default, the information blocks General and Details are already available.
Proceed as follows
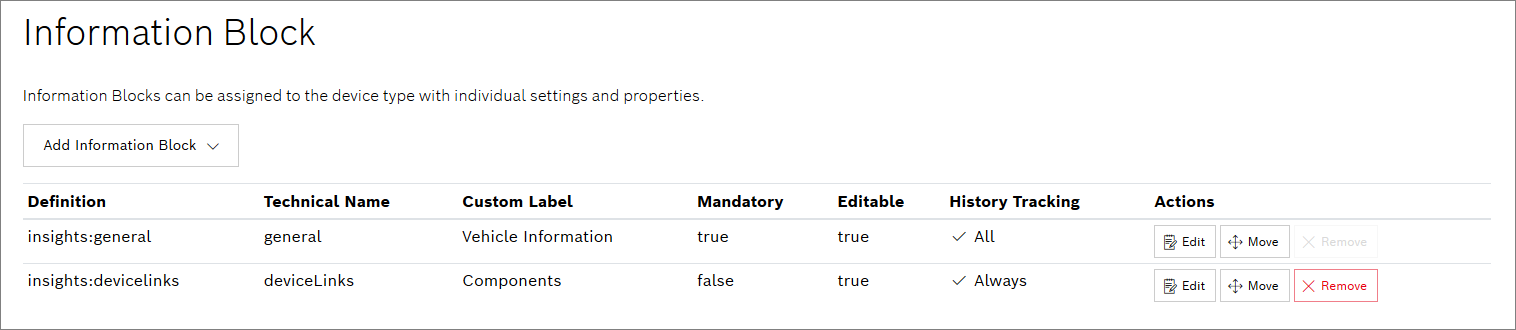
- Click the Add Information Block drop-down list.
Select the desired information block.
→ The information block has been added and can be configured.To change the order of information blocks, click the Move button, hold it, and drop it to the desired location.
To remove an information block, click the Remove button.
Configuring information blocks
Every information block can be enhanced with general information.
Proceed as follows
- In the line of the desired information block, click the Edit button.
- Optionally, change the Technical name of the information block.
- Enter a Custom Label that will be displayed when viewing the device.
- In the Custom Label pane, click the EN drop-down list and select Add DE: German to add the German equivalent for the device type.
- Enter a Description for the information block.
- In the Description pane, click the EN drop-down list and select Add DE: German to add the German equivalent for the description.
- Optionally, activate the Mandatory (initially added to new devices) checkbox so that this information block will be automatically added when the device is created. It cannot be removed.
- Optionally, activate the Enable users for editing checkbox so that users with the role User can edit this information block.
- Optionally, activate the Enable version history for this information block checkbox to enable device history tracking.
- For the Action Buttons information block, add one or more link buttons as follows:
- Click the Add Link Button button.
→ The Add Link Button dialog is displayed. - Enter a Name.
- Add a Link URL. Extend the URL with the device parameters listed in the tooltip.
- In the Action drop-down list, define how the link shall be opened.
- Click the Save button.
- Click the Add Link Button button.
The information blocks General and Details can be enhanced with custom properties. These properties can be of the following types:
- Text (formerly known as "String")
- Text (Multiline)
- Selection
- Number
- Boolean
- Date
- Date time
- Hyperlink
Properties that are added to the information block General are displayed in the device overview and can be used to filter the devices.
Proceed as follows
Click the Edit button in the line of the General or Details information block.
→ The table containing the predefined properties is empty.
For the Software Inventory information block, the predefined properties are fixed and cannot be changed.
- Click the Add Property button to add a new property to the information block.
→ The Property dialog is displayed. - Select a property type in the Type drop-down list.
- Enter a Name for the property.
- Optionally, enter a Hint that explains the property.
- If you selected the type Device, select a device type in the Allowed Device Type drop-down list.
- The following fields depend on which type you selected:
- Text or Text (Multiline): In the Default Value field, enter a text that is displayed as default. In the Validation Rule (based on RegExp) field, enter a validation for the text to follow a specific pattern, e.g. the format of a license plate number.
- Selection: After you added values for selection, select the default value in the Default Value field.
- Number: In the Default Value field, enter a number as default.
- Boolean: Activate the Default Value checkbox.
- Hyperlink: In the Default Link field, enter a default link.
- Device: In the Default Value field, select a device.
- If you selected the type Selection, proceed as follows:
- Activate the Allow multiple values checkbox to allow the user to select from multiple values.
- Activate the Allow custom values checkbox to allow a user to add own values.
- Click the Add Option button to add as many options to select from as desired.
Click the Save button.
→ The properties have been added to the General or Details information block of the device type.
Example: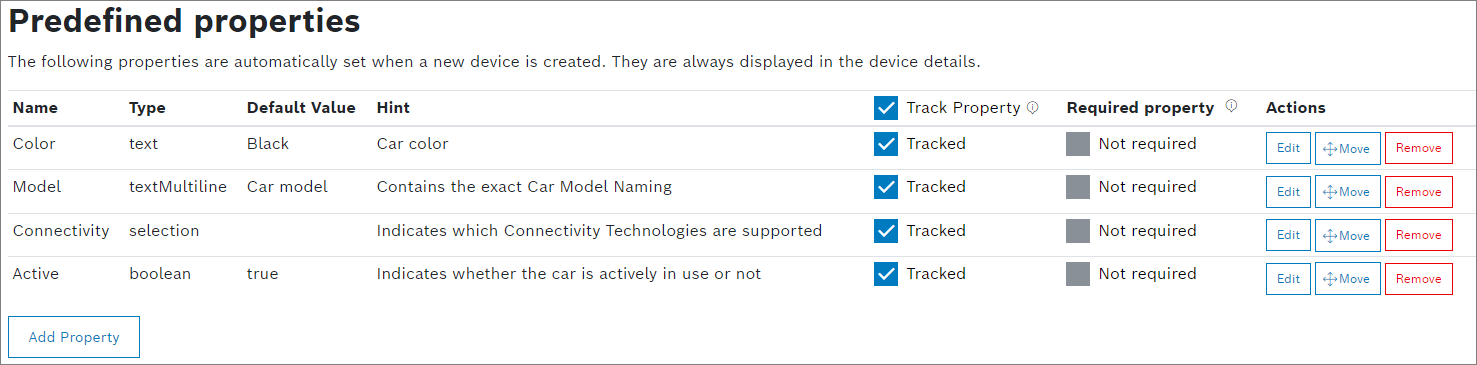
To change the order of properties, click the Move button, hold it, and drop it to the desired location.
To remove a property, click the Remove button.
- In the Track Property column, activate the checkbox in the column header to have all properties tracked in the History or the individual checkboxes for each property.
- In the Required Property column, activate the checkbox for a property to be a required input field when creating a device.
- Activate the Allow Custom Properties checkbox to allow a user to create own properties in the individual devices.
→ The information block has been configured.
The device type has now been configured. To add devices to the device type, go back to the device type overview, refer to Viewing a device type.