To add a new menu item to your side navigation:
- Navigate to Admin > White Labeling > Custom Menu.
Click the  Add Entry icon at the relevant position in the menu structure (left column on the screenshot below).
→ The Add Entry dialog is displayed.
- Fill in the Add Entry dialog as described below.
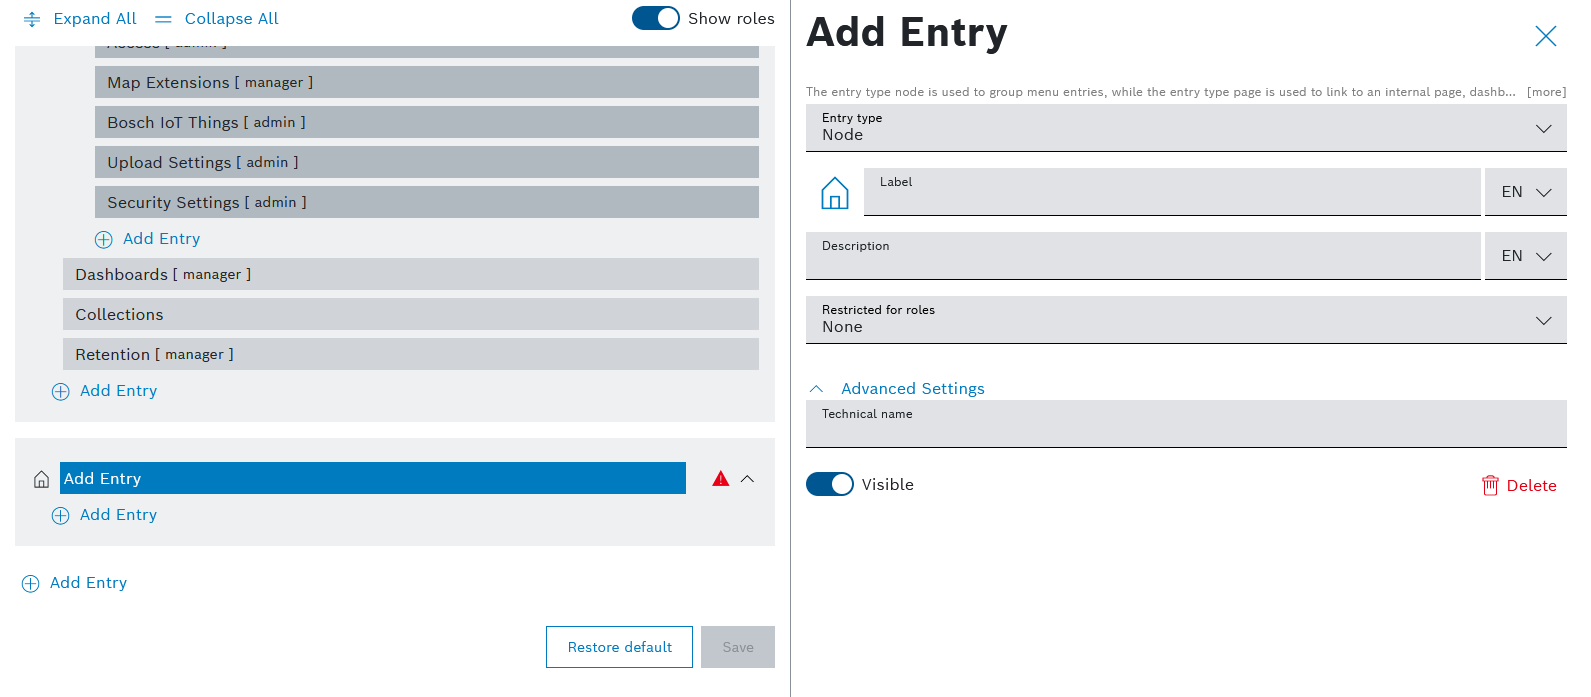
Adding a Node entry
A Node type entry allows you to group other menu items together and does not display any information of its own.
Follow these steps to add a new Node entry to the custom menu of your project:
- In the Entry type field, select the Node option.
- In the Label field, enter a name for the new entry.
- For entries on the first menu level (refer to Understanding menu levels), on the left of the Label field there is an icon, which can be modified as follows:
- Click the icon.
- From the icon set that opens, select a new icon of your choice.
- Optionally, on the right of the Label field, expand the EN drop-down and select DE to add a German language version of the label.
- In the Description field, add a description.
- Optionally, on the right of the Description field, expand the EN drop-down and select DE to add a description in German.
- In the Restricted for roles field, select the roles which will be allowed to access the new menu item.
If you keep the default selection None, all roles will have access to the new menu item. - In the Advanced settings field, a Technical name for the new entry is automatically created, however, you are able to modify it.
- With the Visible toggle, set to the newly created entry to visible or hide it from the custom menu.
The newly created entry is temporarily added to the custom menu structure but is not yet published.
Once all required fields have been properly filled in, the Save button under the menu structure becomes active.
Click the Save button under the menu structure to publish all changes to your custom menu configuration.
- Click the Delete icon in case you want to discard the draft entry and to continue with other custom menu configurations.
For details on how to delete and restore items from your published custom menu configuration, refer to Deleting entries.
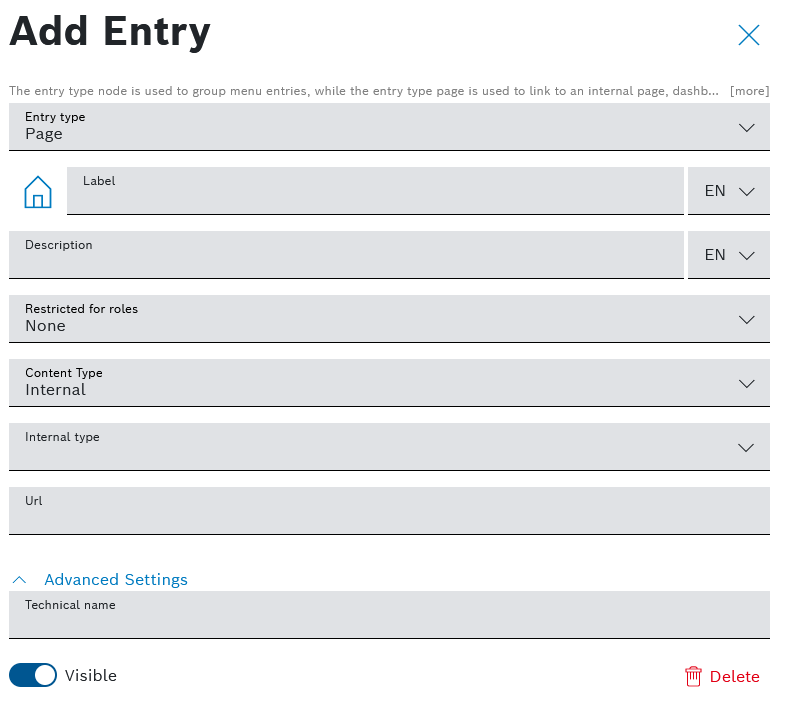
Adding a Page entry
A Page type entry allows you to create a menu item which links to other elements such as existing internal pages and dashboards, as well as external links and iFrames.
Follow these steps to add a new Page entry to the custom menu of your project:
- In the Entry type field, select the Page option.
- In the Label field, enter a name for the new entry.
- For entries on the first menu level (refer to Understanding menu levels), on the left of the Label field there is an icon, which can be modified as follows:
- Click the icon.
- From the icon set that opens, select a new icon of your choice.
- Optionally, click the EN drop-down list and select Add DE: German to add the German equivalent for the label.
- In the Description field, add a description.
- Optionally, click the EN drop-down list and select Add DE: German to add the German equivalent for the description.
- In the Restricted for roles field, select the roles which will be allowed to access the new menu item.
If you keep the default selection None, all roles will have access to the new menu item. - In the Content Type field, select one of the supported content types:
- Internal - an existing internal page, which you can choose from a drop down list
→ If you select this content type option, an additional Internal type field appears which provides you a list of all existing internal pages to select from.
- Dashboard - an existing dashboard, which you can choose from a drop down list
→ If you select this content type option, an additional Dashboard field appears which provides you a list of all existing dashboards to select from. - Link - an external link, for example https://...
- iFrame - an iFrame, for example https://...
- In the Url field:
- Enter a Url manually, in case you have selected the content type Link or iFrame in the previous step.
- A Url is filled in automatically, in case you have selected the content type Internal or Dashboard in the previous step.
- In the Advanced settings field, a Technical name for the new entry is automatically created, however, you are able to modify it.
- With the Visible toggle, set to the newly created entry to visible or hide it from the custom menu.
The newly created entry is temporarily added to the custom menu structure but is not yet published.
Once all required fields have been properly filled in, the Save button under the menu structure becomes active.
Click the Save button under the menu structure to publish all changes to your custom menu.
- Click the Delete icon in case you want to discard the draft entry and to continue with other custom menu configurations.
For details on how to delete and restore items from your published custom menu configuration, refer to Deleting entries.