The menu customization allows you, as an Admin, to change the position of menu items on the list.
Consider the following information and try out the presented actions:
Understanding menu levels
There are three menu levels:
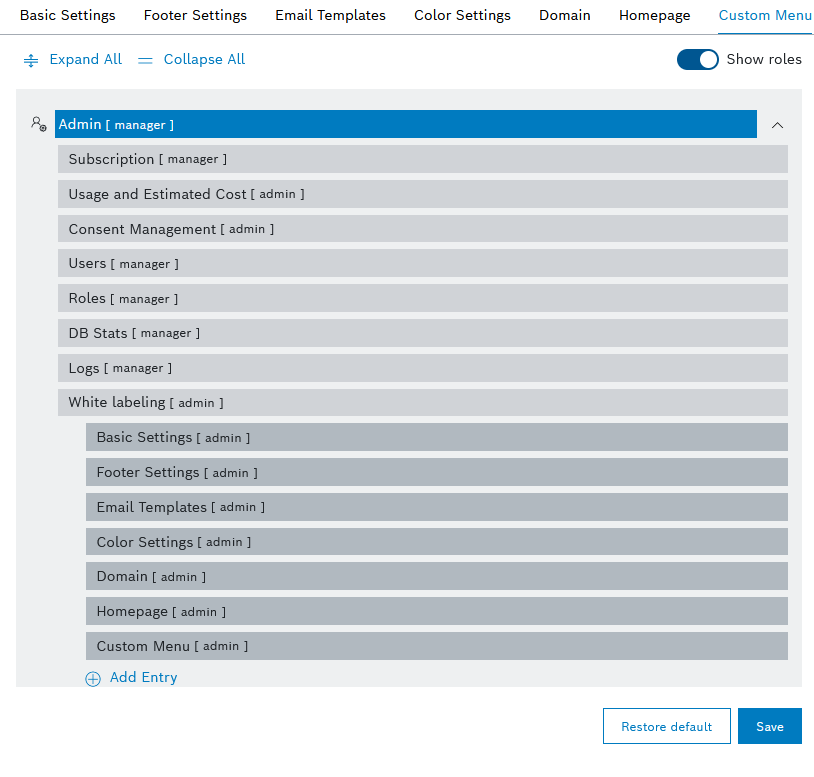
- Level 1: This is the main menu visible on the side navigation of your project. These are the items which have an icon.
An example of level 1 menu item is Admin. - Level 2: This is the sub-menu which becomes visible on the side navigation of your project when you expand an item from level 1.
An example of level 2 menu item is White Labeling. - Level 3: This is the tab navigation displayed horizontally above the content of menu items from level 2.
An example of level 3 menu item is Basic Settings.
In the Custom Menu configuration view, these levels are represented as on the following screenshot:
Arranging menu items
Vertically
Using drag and drop, you can move menu items up or down the list.
This will not change the hierarchy level of the moved item.
Horizontally
Using drag and drop, you can move menu items left or right on the list.
This will affect the hierarchy of menu items, as explained above in Understanding menu levels.
Displaying menu item details
The following actions are available:
Expand and Collapse
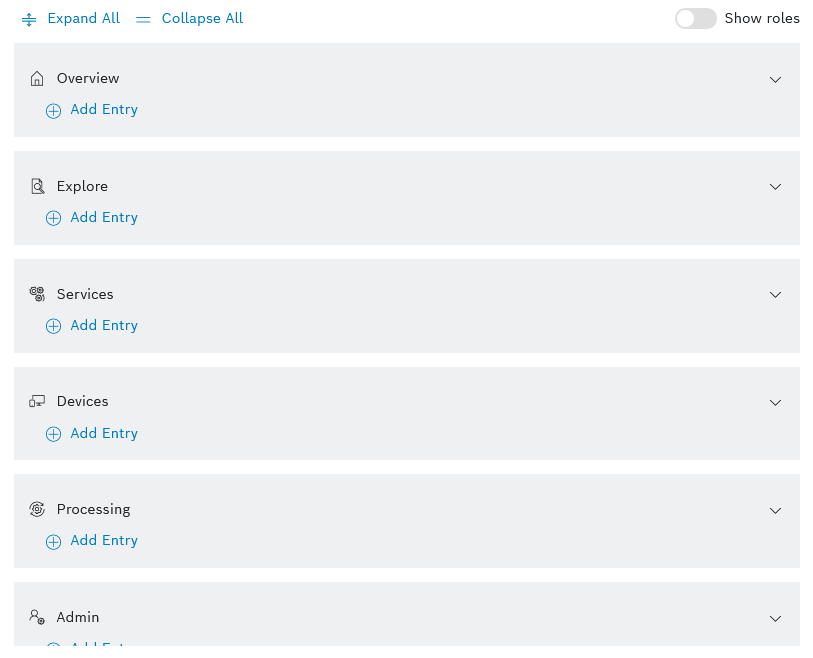
Use the arrow on the right of a level 1 menu item, for example Explore on the screenshot below, to show and hide its sub-items, if any.
Expand all and Collapse all
Use the options Expand All and Collapse All on top of the menu items list when you want to see only menu items from level 1 or to see all menu items from all levels.
Show roles
Use the Show roles toggle to show or hide from the current view the roles which have access to the specific menu items.
The toggle is active by default.

