Using the widget context
Custom widgets have access to specific information, called widget context , which is provided by Bosch IoT Insights.
This context contains key data about the current widget and its environment, allowing you to customize and enhance your widget's behavior. Such data is also required when making API calls, as explained below.
By following this guide, you can fully utilize the widget context and data source capabilities to create dynamic and interactive custom widgets.
Context details
The widget context includes the following properties:
|
Property |
Type |
Description |
|
project |
string |
Name of your project |
|
dashboardName |
string |
Name of the dashboard you are working on |
|
widgetId |
string |
ID of your custom widget |
|
filterParams |
Record<string, any> |
Currently available filter parameters (empty if no filter widget is active) |
|
insights |
InsightsUserContext |
User context information, including user data, language, timezone, etc. |
|
projectRoles |
string[] |
Current user roles (e.g. admin, manager, power-user) |
|
customConfigValues |
Record<string, any> |
Admin-configurable properties specific to the widget |
|
hasDataSourceConfig |
boolean |
Indicates if the data source is enabled |
|
widgetFilesUrl |
string |
Path to your widget files Use this to access assets (e.g., <img [src]="_context?.widgetFilesUrl + '/assets/hello.png'">). |
Accessing the widget context
You can access the widget context by using:
the @Input decorator in Angular,
the getAttribute in vanilla JavaScript,
other, depending on your framework.
Whenever there is an update in the context, the widget will automatically receive the latest version.
Consider the following examples:
@Input() set context (value: string) { this._context = value ? JSON.parse(value) : undefined;}get context() { return this.getAttribute('context');}Accessing the data source
If your custom widget is configured to involve a data source (see Configuring the manifest file), you can listen for changes in it. An update in the data source will trigger an event.
Consider the following examples:
@HostListener('data', ['$event']) onData (ev: CustomEvent) { console.log('Received data', ev.detail); this.data = ev.detail; }this.addEventListener('data', (d) => { console.log('data', d);});Using the widget context values in REST requests against the Insights API
You can use the widget context values to interact with the Insights API.
For detailed information on the available endpoints, refer to API references and the corresponding Swagger documentation.
Using the widget context values to execute REST request definitions
If you want your widget to execute REST request definitions, follow these steps:
In the widget's manifest file (see Configuring the manifest file > configProperties > RestRequestDefinition), add a REST request definition.
On the Insights UI, use the widget's newly added configuration pane (as on the screenshot below) and configure the respective REST call, which can be either internal or external.
In our example, we will configure a call to access data from an external system.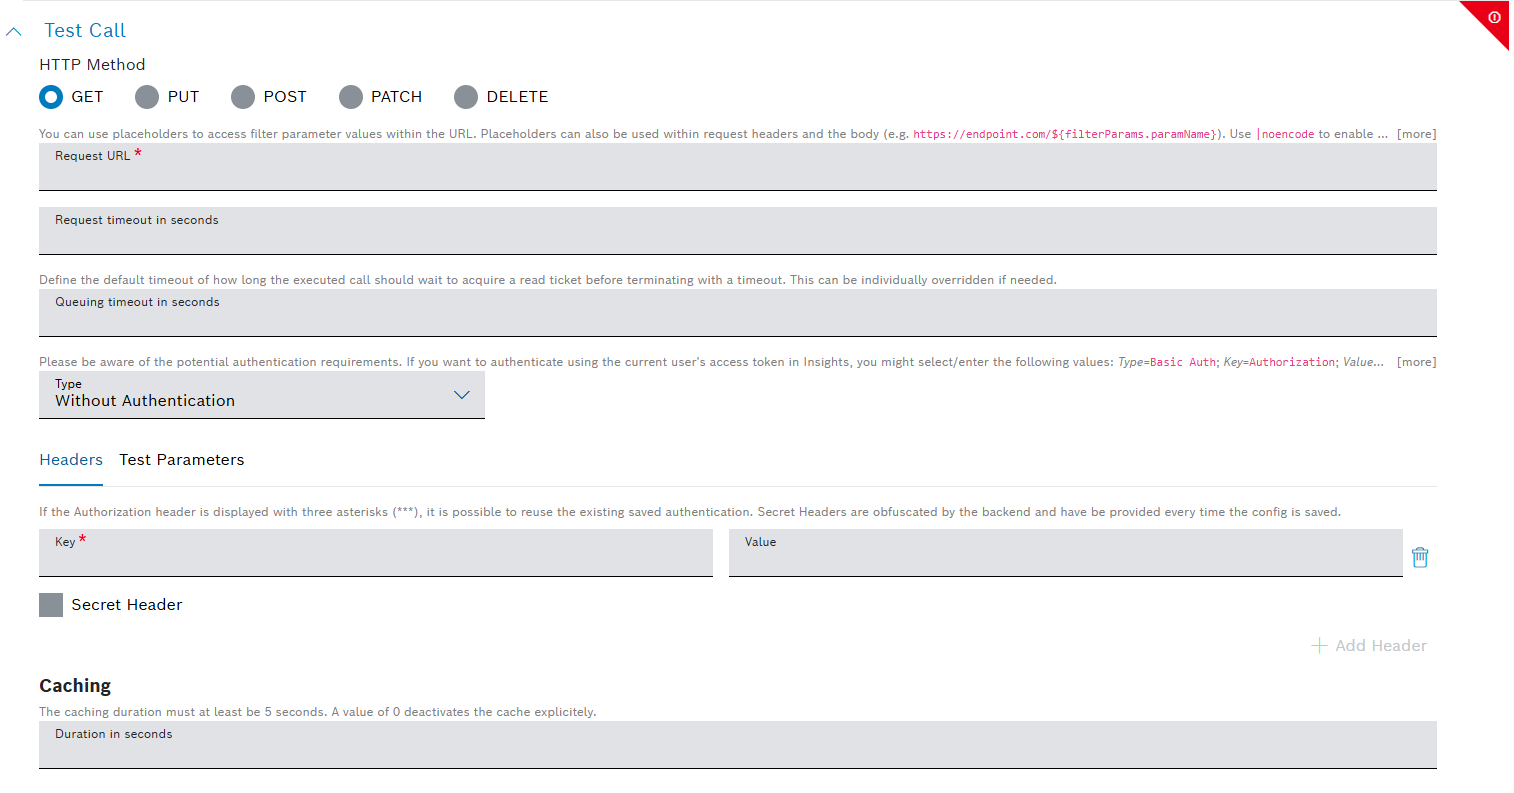
Execute the REST call, as shown in the example below.