Basic Settings
In the Basic Settings tab of White Labeling, you can define the project's label, tags, landing page, contact information, links, font, and logo.
Prerequisites
To adjust the basic information of a project, you need to be assigned to the Manager role or higher.
Viewing the basic information
Proceed as follows
In Admin > White Labeling, click the Basic Settings tab.
→ The Basic Settings tab is displayed and shows the general project information.
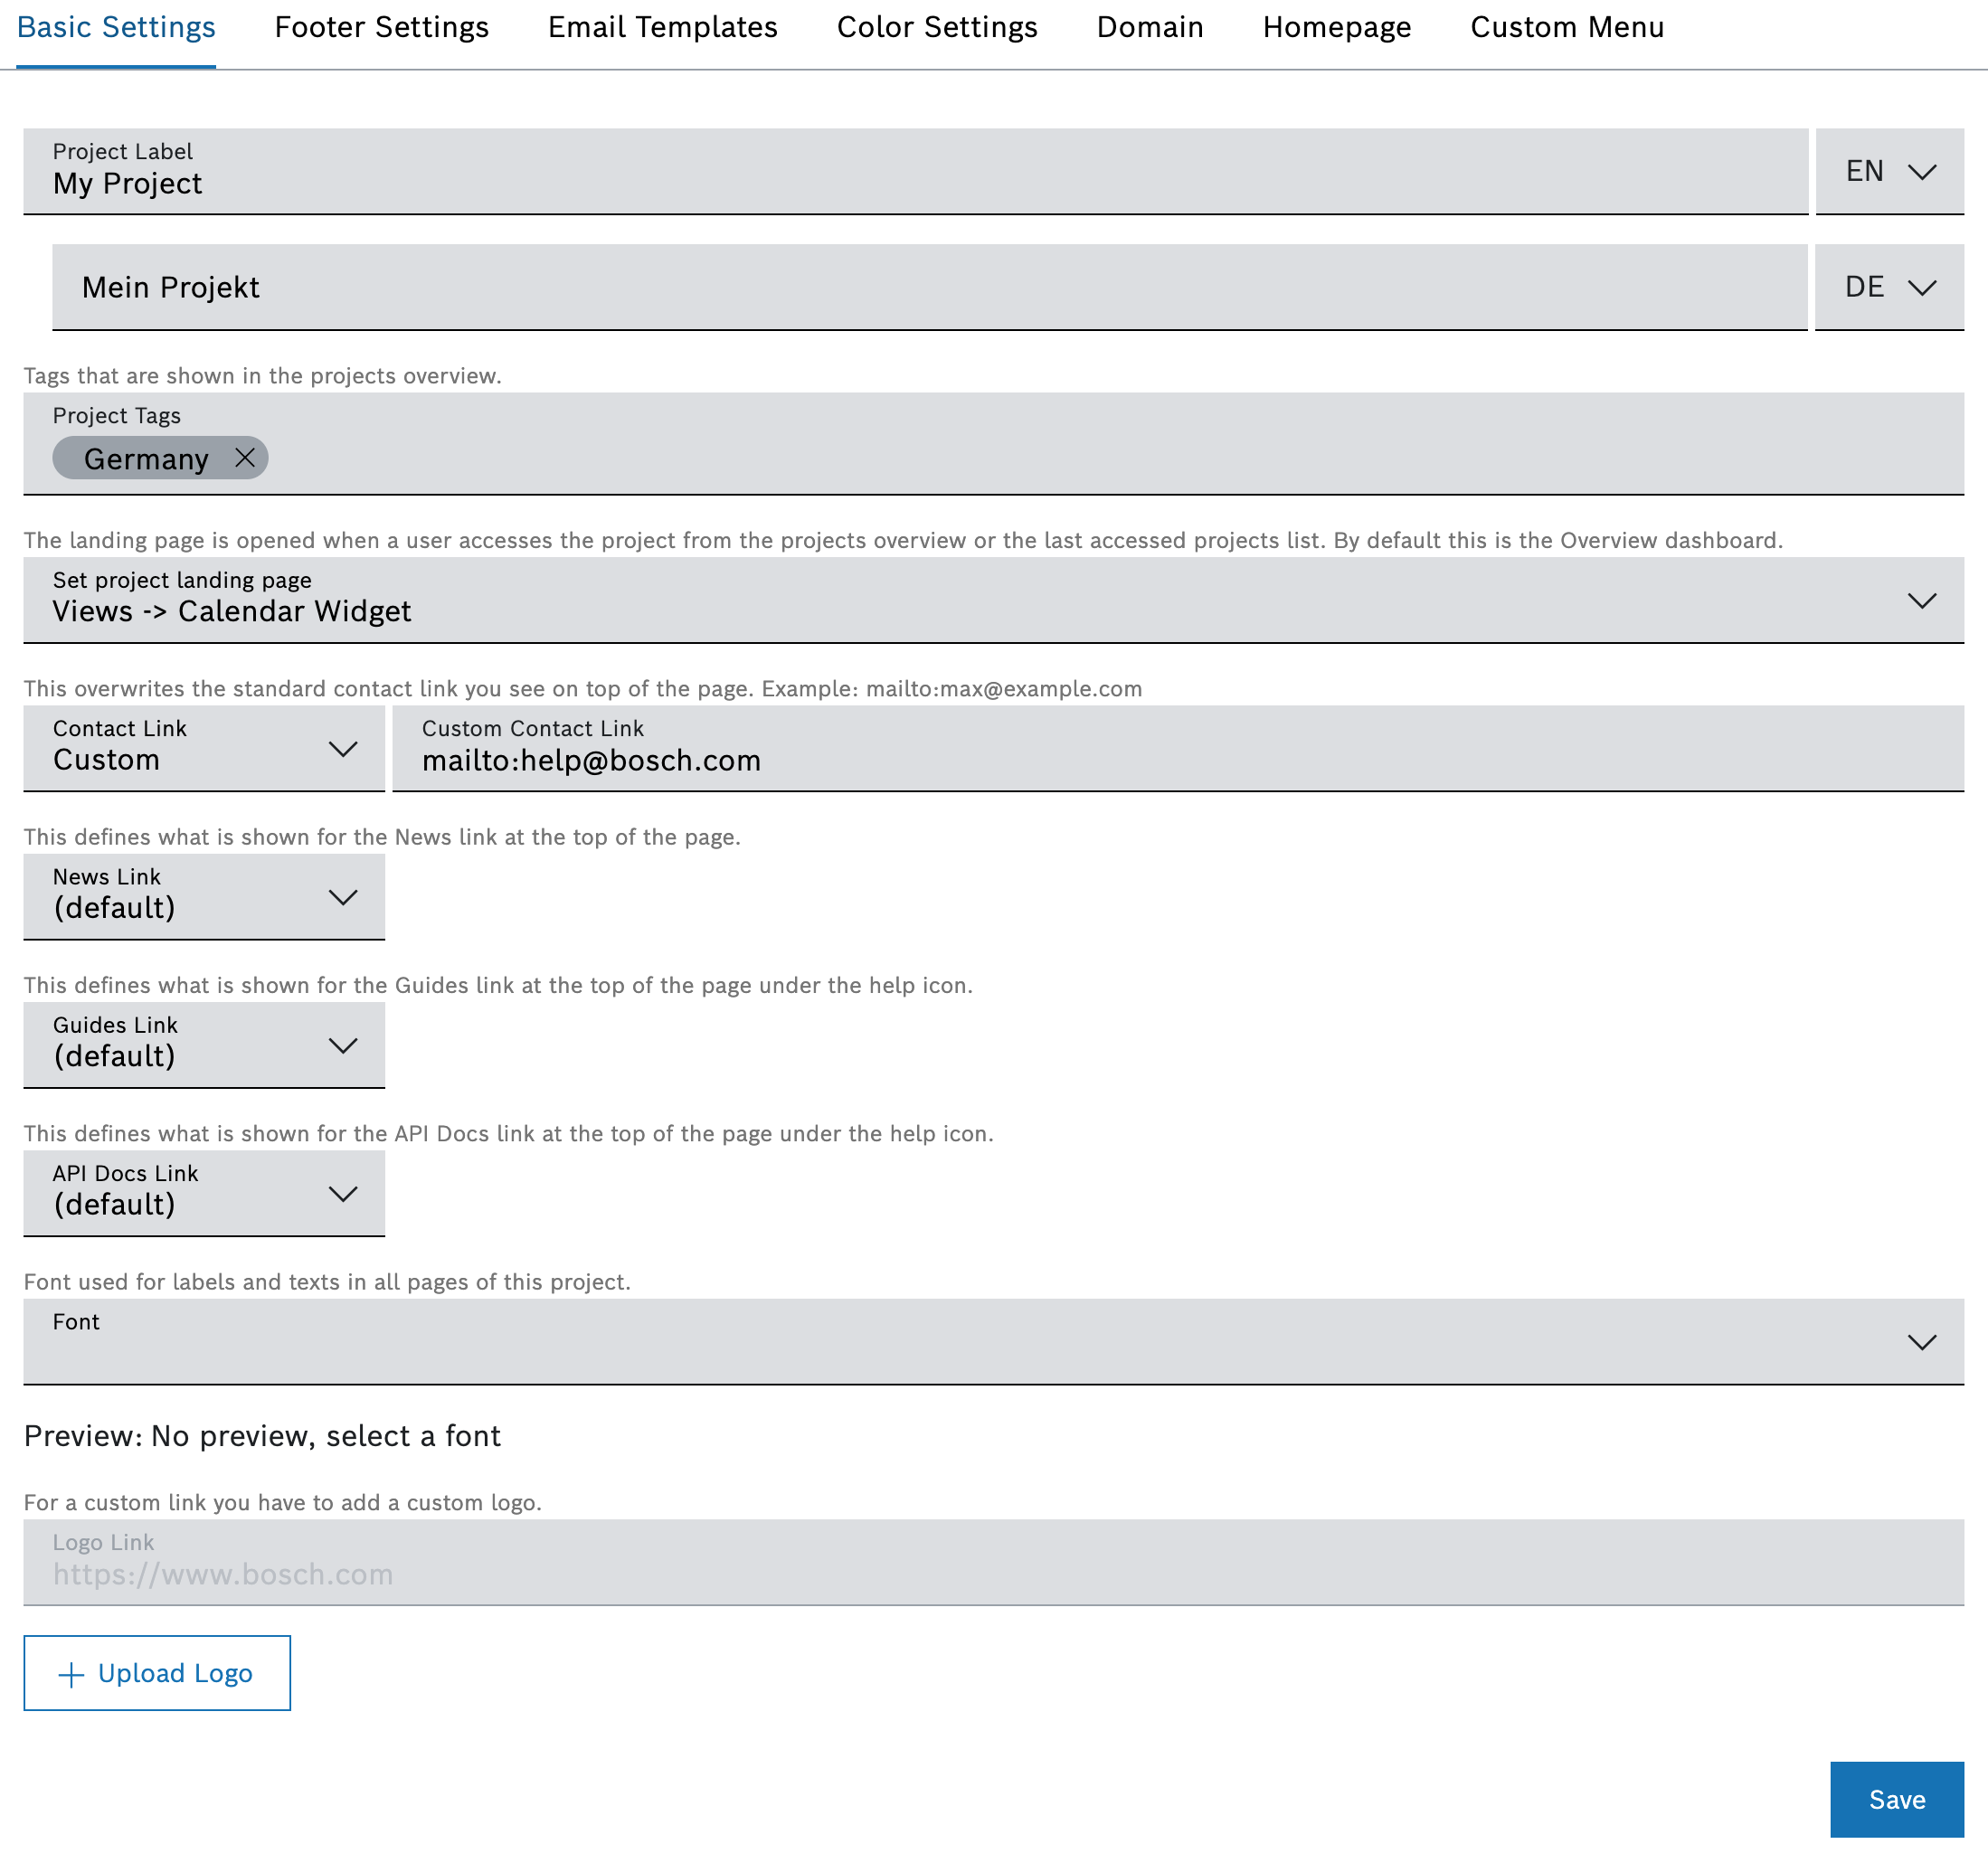
Each field from this dialog is explained below.
Adjusting the basic information
Proceed as follows
In the Project Label field, enter a name for your project.
Click the EN drop-down list and select Add DE: German to add the German equivalent for the label.
In the Project Tags field, add tag(s) to the project, which you can later use for searching and filtering through the list of projects. For details about project searching and filtering, refer to Viewing more projects.
→ When the changes are saved, the newly added tag will be displayed on the list of projects.In the Set project landing page drop-down list, select a main menu item that will then always be displayed after you logged in.
In the following link-related fields, you can choose whether to show the default link of Bosch IoT Insights, hide the link completely, or define a custom link.
In particular, these are the links which are displayed in the UI header bar, as described on the User guide landing page.In the News Link field, you can define the link of the globe icon in the UI header bar.
In the Contact Link field, you can define a custom link that will open when users click the Contact button in the UI header bar.
In the Guides Link field, you can define the link which is shown as Guides under the help icon in the UI header bar.
In the API Docs Link field, you can define the link which is shown as API Docs under the help icon in the UI header bar.
In the Font drop-down list, select the font for the text elements.
Keep in mind that in case the user does not have the selected font installed, the browser will fall back to a font family that is available.
In the Logo Link field, enter a link for the logo to navigate to a custom website via the logo.
Click the Upload Logo button to change the logo displayed at the top left-hand side.
Click inside the Upload Logo field and select an image.
The recommended image size is 70px (H) and 100px (W).
→ The image is displayed.
Click the Save button to save the image as logo.
→ The image has been saved as logo.
Click the Save button to save the general project settings.
→ The basic information has been saved.