The Collections guide elaborates on the following topics:
The Collections menu provides three tables of collections grouped according to their categories of Custom data, History & Logs, and System internal along with their name, description, type, and action.
Prerequisites
To have access to the Admin's Collections menu, you have to be assigned to the Admin role or higher.
Proceed as follows
On the left navigation, expand the Admin menu and select Collections.
→ The Collections menu item is displayed. The three types of collections are grouped in tables, namely Custom data, History & Logs, and System internal.
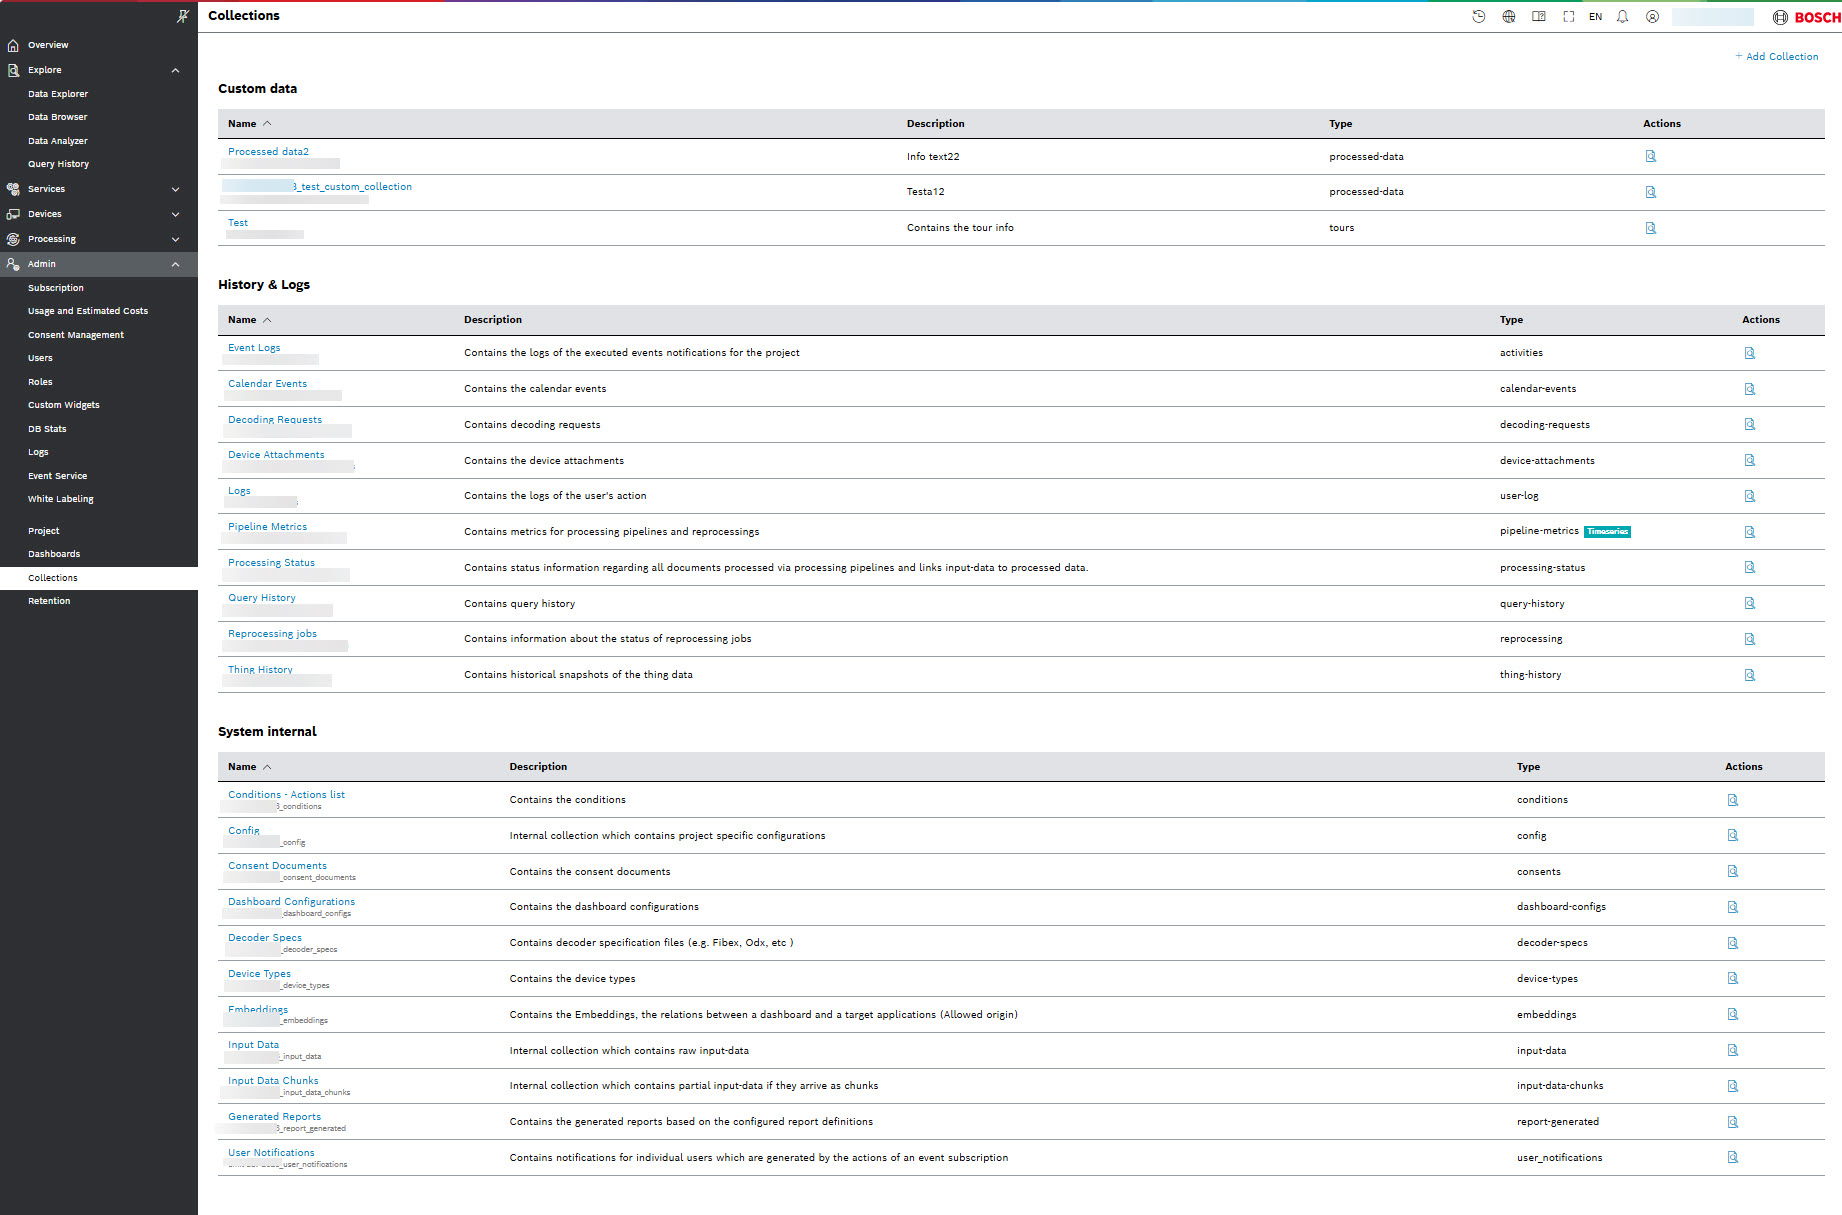
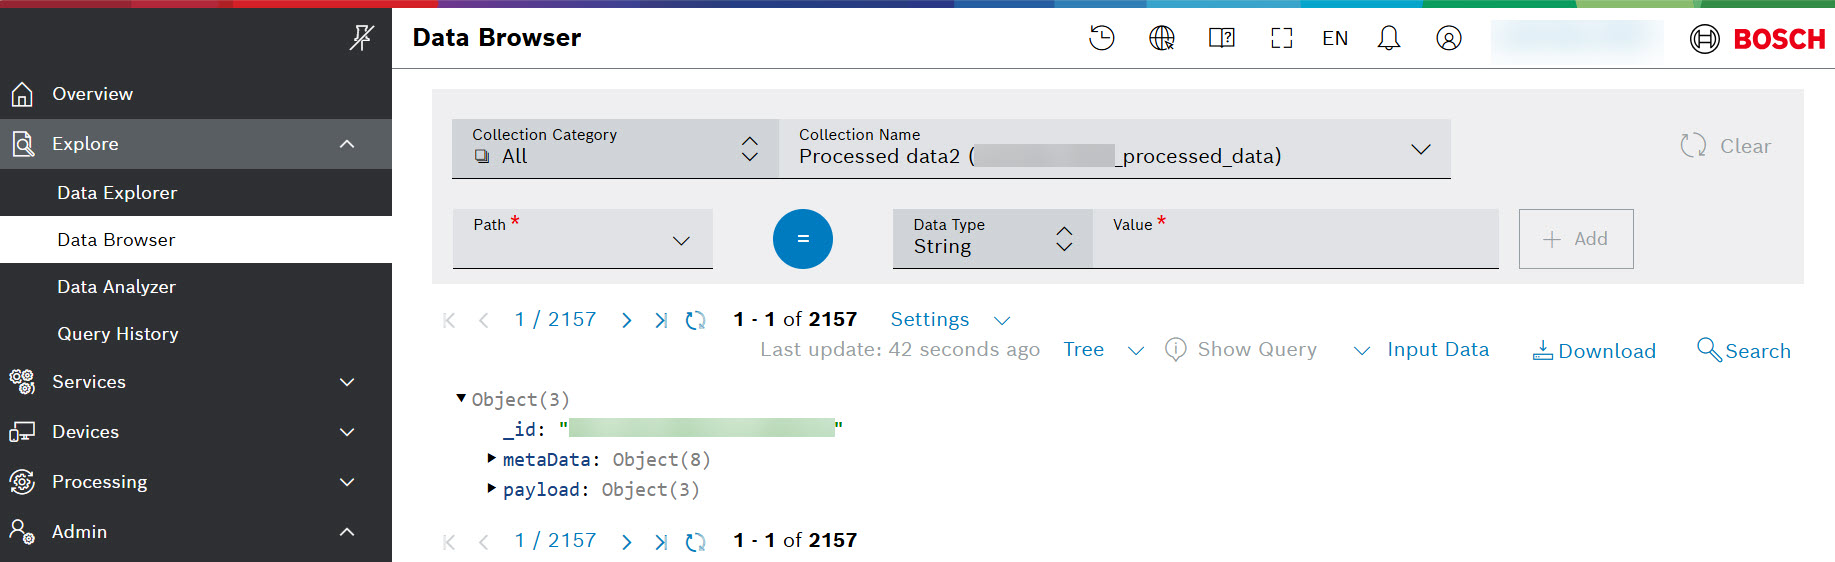
The tables provide the name and description of the collection, its type and available actions. Selecting the search ![]() icon from the Actions column takes you to the Data Browser menu:
icon from the Actions column takes you to the Data Browser menu:
Adding a new collection
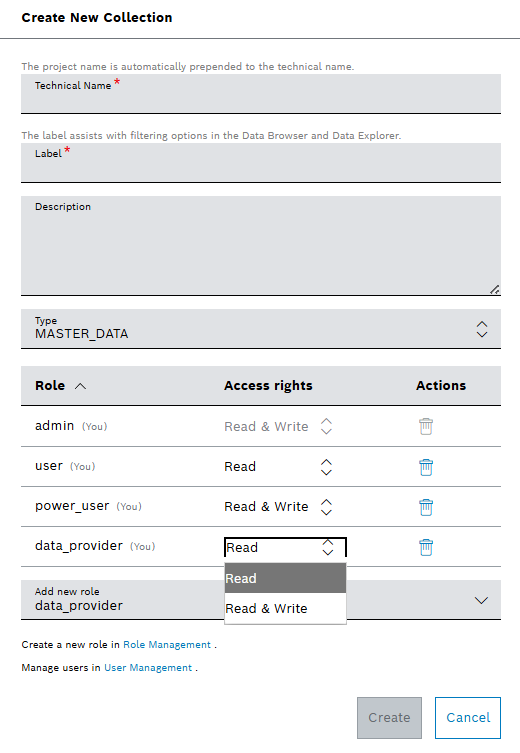
You can add a collection using ![]() Add Collection button at the upper right-hand area. Then you will be prompted to enter the following information in the Create New Collection window:
Add Collection button at the upper right-hand area. Then you will be prompted to enter the following information in the Create New Collection window:
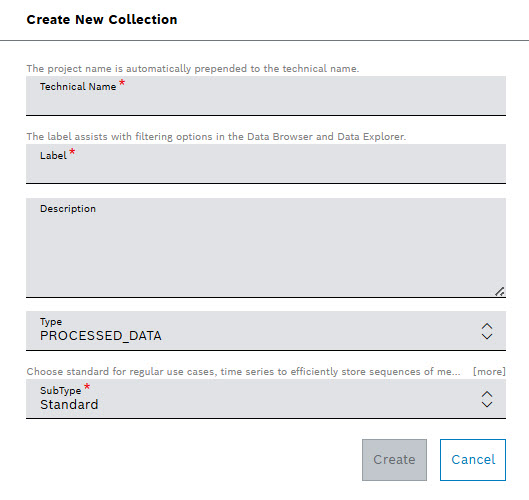
If you are creating a collection of master-data type, you will be able to add new roles and assign access rights accordingly, as described in the Details view below.
Details view
Selecting the name of a collection from a table, opens the Details view, which includes information about the Label, Technical Name, Description, and Type of the selected collection. The data from the Statistics refer to the number of documents, and the sizes of data, total index and storage:
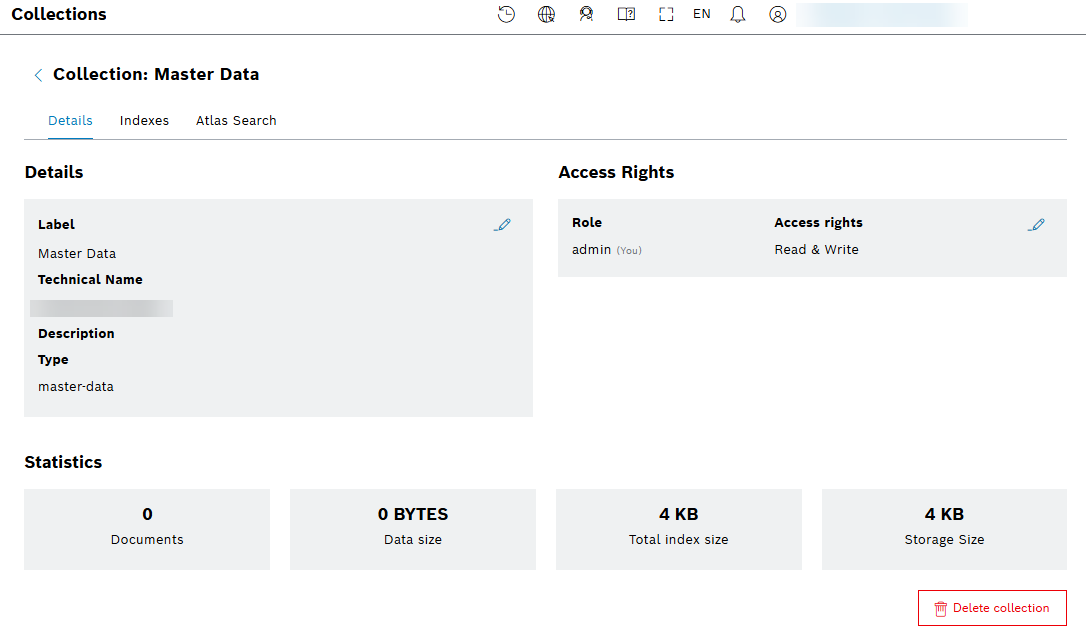
The Access Rights section is supported only for Master Data collections. You can edit the access rights, and add new roles to better control data modifications and to ensure data integrity.
Access rights assignments are also available when creating a new master-data collection:
Indexes view
Indexes provide efficiency while executing queries in MongoDB. When an application is repeatedly sending queries on the same fields, create an index on those fields for improving performance for those queries. If no indexes are created, MongoDB is scanning every single document in a collection and returns query results. If an appropriate index exists for a query, MongoDB is using the index to limit the number of documents for scanning.
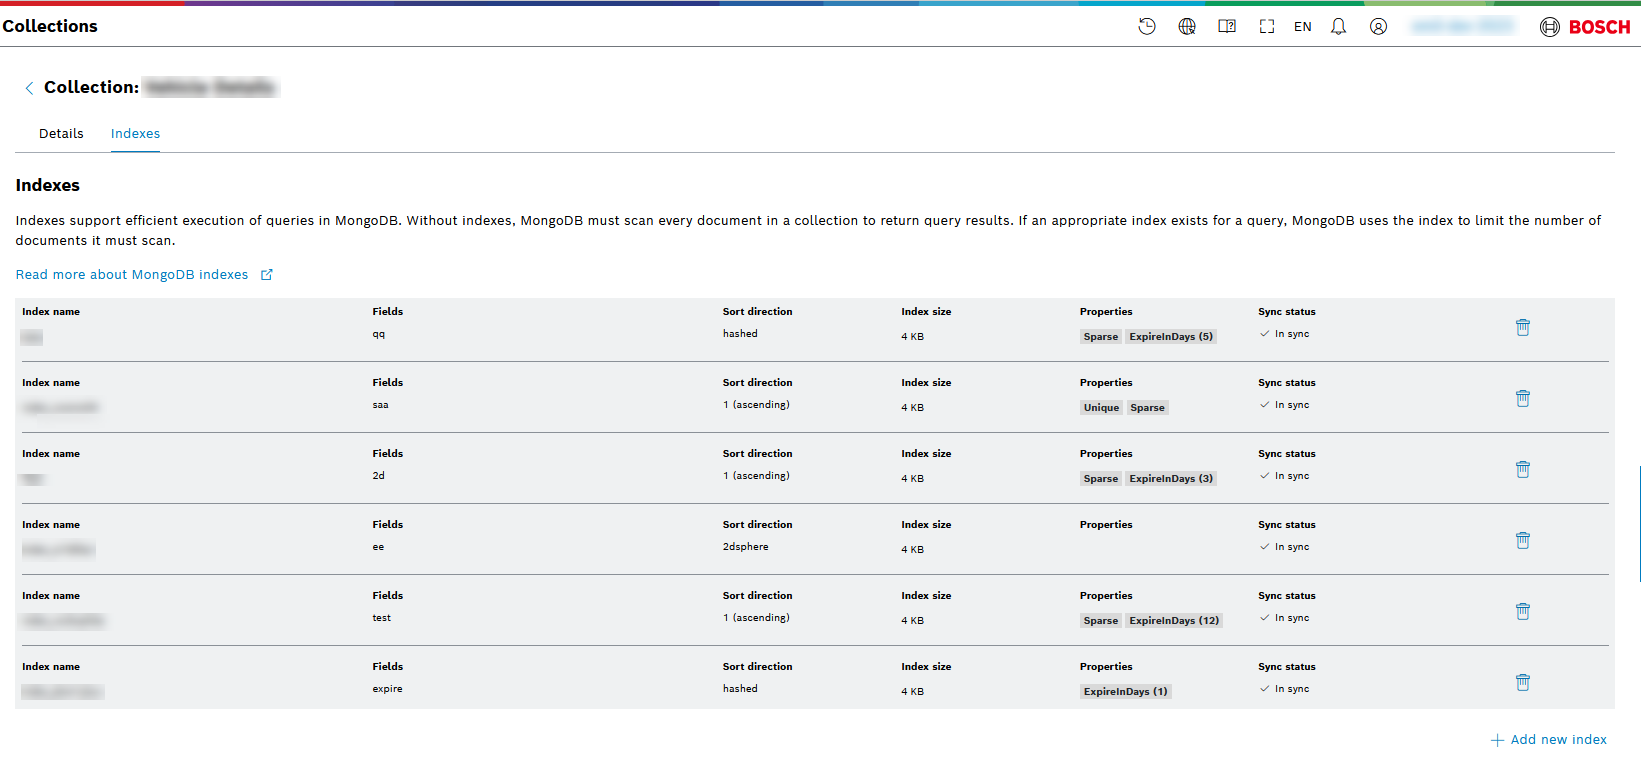
Adding and removing index
To add new index use ![]() Add new index button at the right-hand side at the bottom. Then you will be prompted to enter the following information in the Add new index window:
Add new index button at the right-hand side at the bottom. Then you will be prompted to enter the following information in the Add new index window:
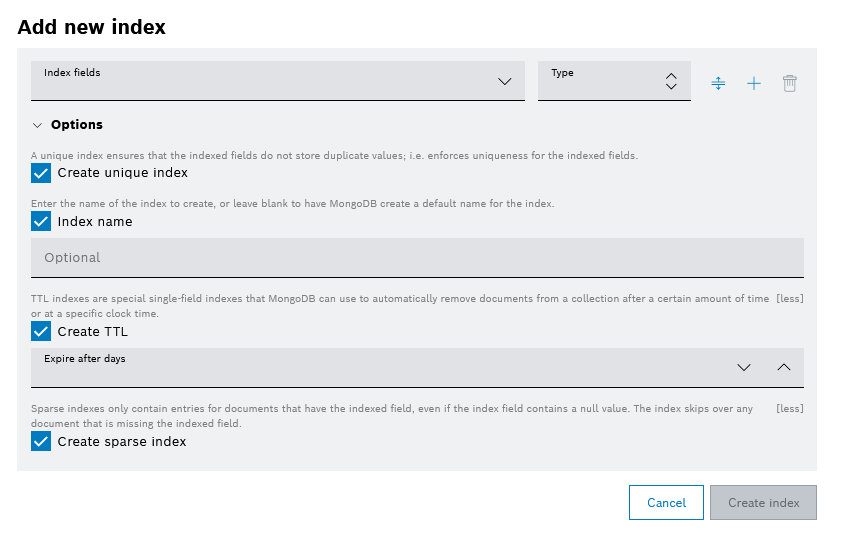
You can add index fields with ![]() button and reorder them later with
button and reorder them later with ![]() button. It is possible to remove an index using the remove
button. It is possible to remove an index using the remove ![]() icon only if the index is added successfully.
icon only if the index is added successfully.
Atlas Search view
Atlas Search is related to MongoDB, providing several kinds of text analyzers, a rich query language to create complex search logic, customizable score-based results ranking, and advanced search features for your applications like autocomplete, pagination, and faceting. For more information, refer to Atlas search.
Atlas search view presents the indexes in a table with their Index name and Index size. Their Status can be one of the following as described in MongoDB Search Index Statuses. The Queryable column of the table provides answers of YES or No to the question of whether the index can be used in a query to retrieve information from a database or not. The Sync Status column shows if what is provided in the project configuration for the index is synchronized with the real index in the database.
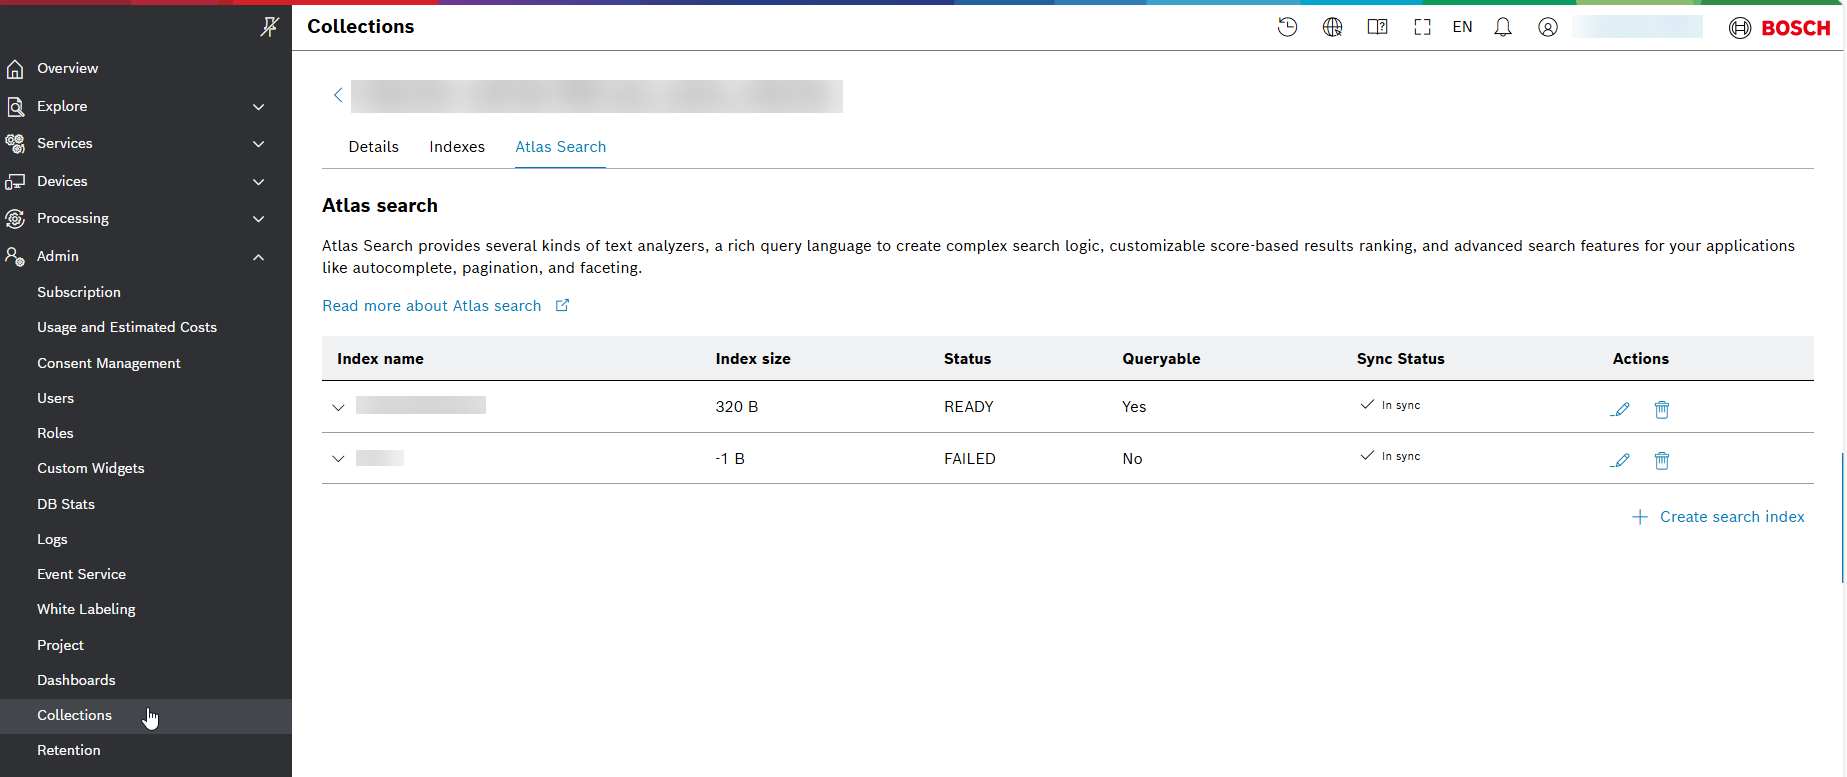
Learn what are the actions with the Atlas search indexes from the following section:
Actions with Atlas search
You can update and delete existing search index using the respective icon of![]() and
and![]() from the Actions column.
from the Actions column.
From the Update search index window you can not change the name of the index, but its payload only. You can also undo and redo your changes with the buttons of Undo![]() and Redo
and Redo ![]() , and format and copy the payload with Format
, and format and copy the payload with Format![]() and Copy
and Copy![]() buttons. Confirm your changes with the Update search index button at the right-hand side at the bottom:
buttons. Confirm your changes with the Update search index button at the right-hand side at the bottom: 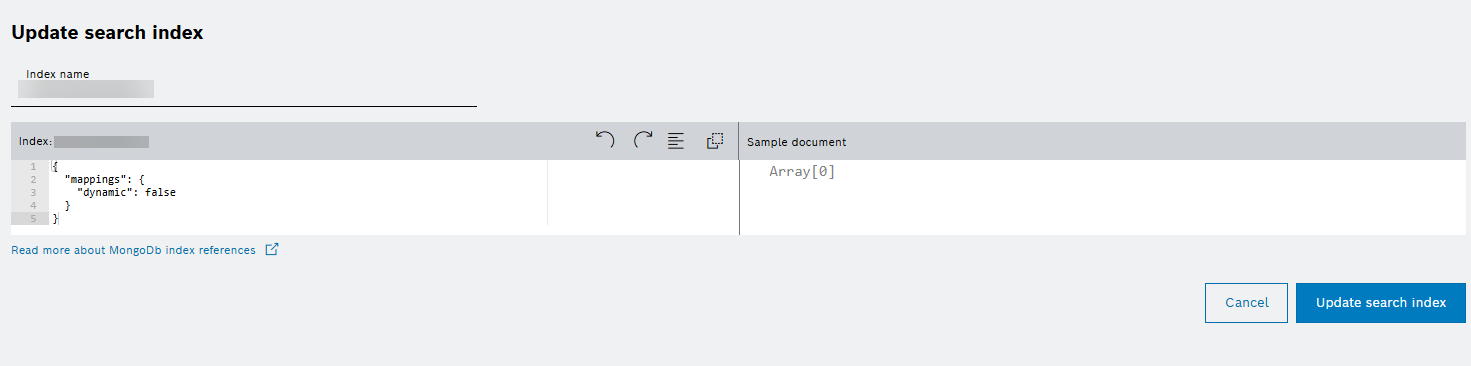
To create a search index use ![]() Create search index button at the right-hand side at the bottom. Then you will be prompted to enter the following information in the Add new search index window:
Create search index button at the right-hand side at the bottom. Then you will be prompted to enter the following information in the Add new search index window:
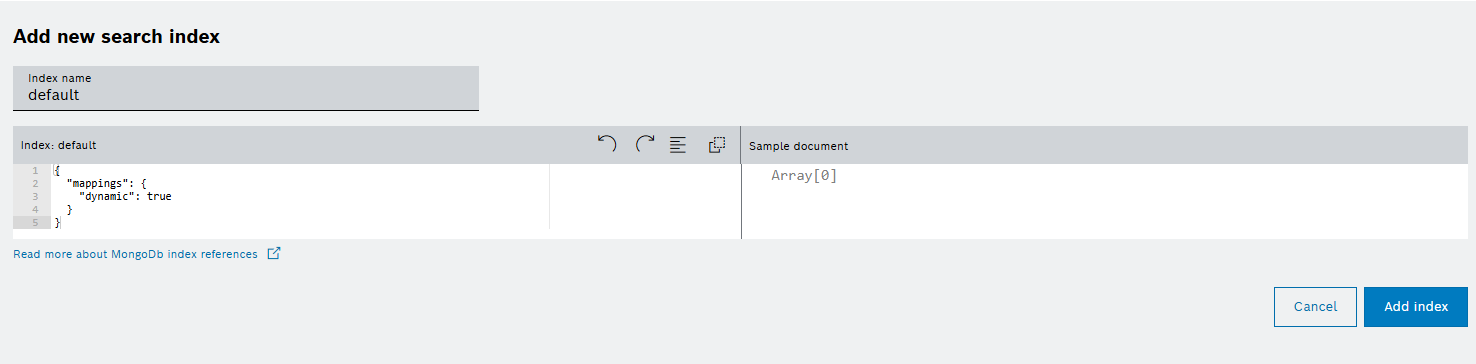
Confirm your choice for the name and the payload of the index with the Add index button.