Query templates: Faceted search
Here we will provide a detailed analysis of the structure of the query templates which were used in the tutorial dedicated to the Configuring the faceted search.
In the tutorial we had two widgets on the same dashboard - a filter widget with configured faceted search, and a table widget displaying the filtered data. Each of them had a dedicated query template.
Some of the steps below may seem too detailed but their purpose is to help you understand more deeply how the query templates work.
See also the Developer guide topic on Query templates.
Create a regular query template
This is the query template which was ultimately used as a data source of the tutorial's table widget.
Proceed as follows:
On the left navigation, go to Explore > Data Explorer and click
 Add Query Template in the top right area.
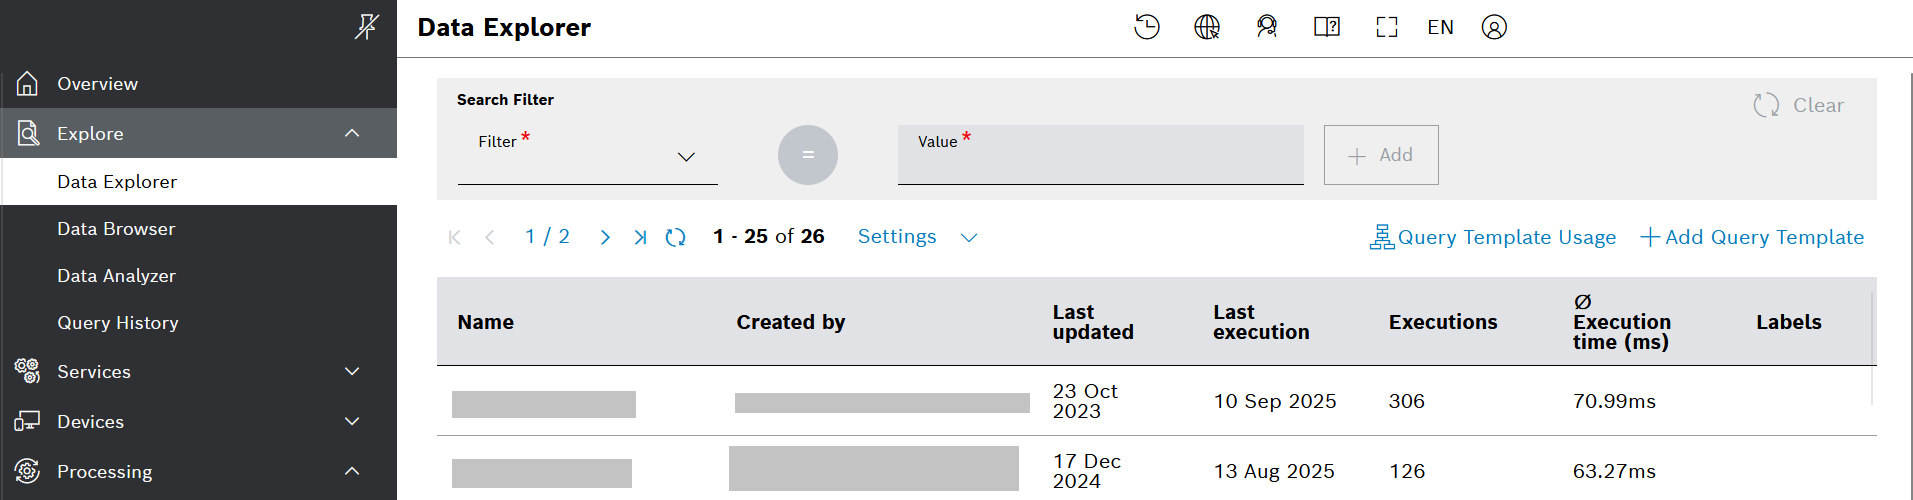
In the Template Designer view that opens:
Add a Name, for example Watermeter data - regular template.
Fill in the following basic query:
→ The query template flattens the data, so it looks like this:
Add parameters and a match stage
These parameters will be displayed later on as widget data source parameters and will be linked to filters.
Proceed as follows:
In the Parameters section of the Template Designer, click
Add parameter for each parameter that you are going to add: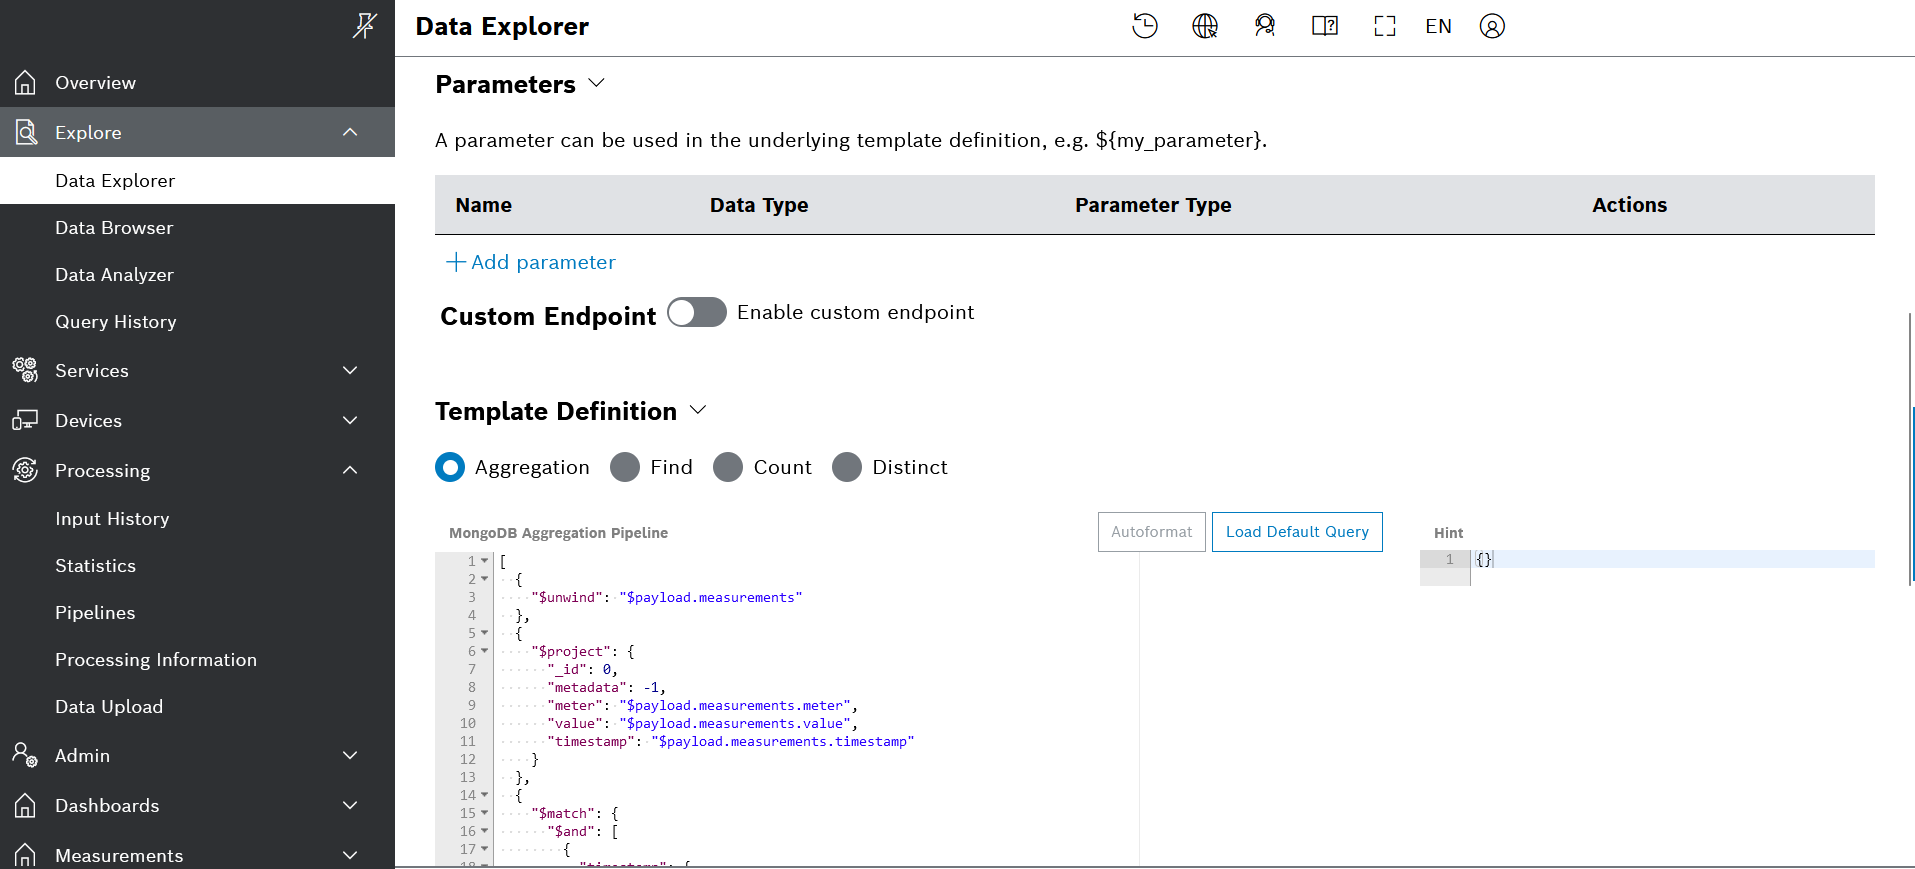
Initially, add three parameters as follows:
Technical Name
Data Type
Parameter Type
timeRange
TIMESTAMP
RANGE
flats
STRING
SCALAR
value
FLOAT
RANGE
The parameters would look like this:
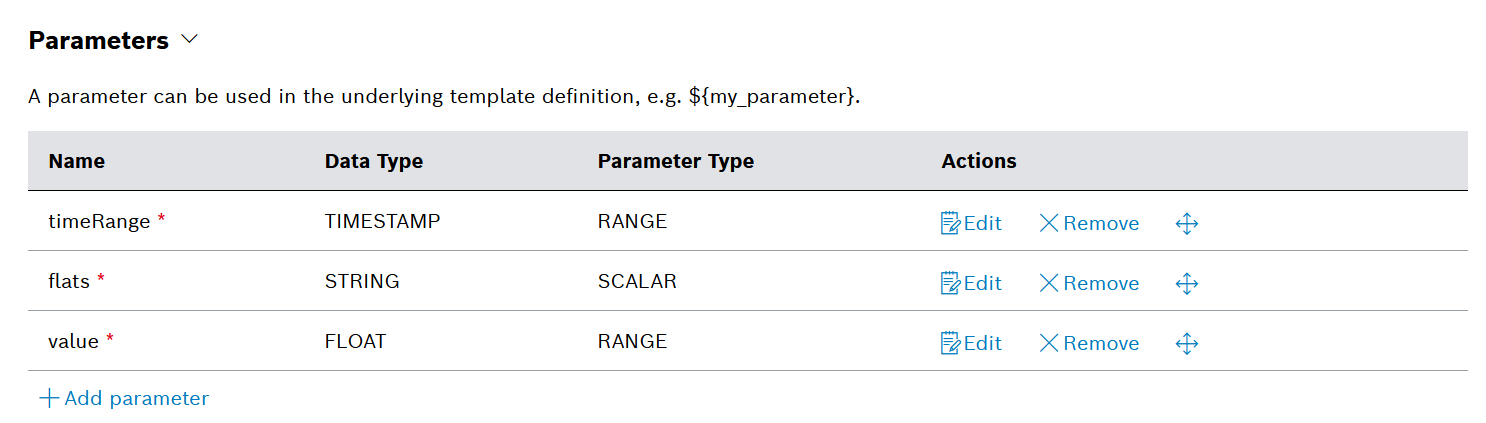
By default, the parameters are mandatory and this is indicated by an asterisk next to the name.
In the Template Definition section, adjust the query by adding the following $match stage at the end:
→ The whole query at this point would look like this:
Click the Save Changes button.
To test the query directly within the Template Designer, enter some values for the parameters and click the Run (cached) button:
Keep in mind that all example watermeter data falls within the time range from 2018-07-01 00:00 to 2018-08-31 23:59, therefore you need to set the timeRange parameter accordingly. After selecting the respective dates, do not forget to click the Apply button under the selection.

Adjust the template definition
With these settings, the query template will work with the following limitations:
It will only filter on a single flat name, however, you may want to select multiple flats.
All parameters are mandatory, however, you may want to omit for example the value range and to see all the documents for the matching flats and time range.
You can address these issues by using FreeMarker.
Proceed as follows:
Edit the flats parameter and change its Parameter Type from SCALAR to LIST .
Use the #list directive to create an $or match on any of the values of the flats parameter, for example as follows:
Make all three parameters optional. To do that, click the Edit button for each parameter in Template Designer and check the Optional checkbox.
Use the #if directive to include a certain match block only when the corresponding parameter is provided. For example, for the value parameter this would look like this:
→ As a result, the updated Watermeter Data query would look like this:
With that, the regular query template is ready.
Create a facet search query template
A facet search query template is similar to a regular query template but it will only return the available filters and the number of entries matching them, instead of returning the entries themselves.
This kind of query template is only used in a filter widget.
To generate the facet information, you will use the MongoDB $facet aggregation operator.
For this template, we will build upon the parameters and filters of the regular query template which we created above. Therefore, we can easily duplicate it and create a new one based on it.
Proceed as follows:
Go to the Template Designer view of the regular query template and click the Duplicate Template button.
Enter a new Name that will help you recognize the template later on, for example Query template for facet search - Watermeter data.
Now you can make the relevant adjustments and save it when ready.
Let's first create the facet stages for the relevant parameters and then we will combine them in the new query.
Create a facet stage for the flats parameter
To generate facet information for the flats parameter, use the $sortByCount stage as follows:
"$facet": { "flats": [ { "$sortByCount": "$meter" } ],}→ The generated output is as follows:
[ { "flats": [ { "_id": "Flat 1", "count": 972 }, { "_id": "Flat 2", "count": 467 }, { "_id": "Flat 3", "count": 236 } ] }]Create a facet stage for the timeRange parameter
The facet query for the timeRange parameter is more complex.
For this facet query, you should use the $bucket aggregation stage, in order to have the documents categorized into buckets with specified boundaries.
In our case, the boundaries will be the start and the end of each day in a certain range, for example the months visible in the calendar widget.
For example, if you want to generate facet information for 3 days from 2018-07-01 to 2018-07-03, your facet query would look like this:
"$facet": { "timeRange": [ { "$bucket": { "groupBy": "$timestamp", "boundaries": [ { "$date": "2018-06-30T21:00:00Z" }, { "$date": "2018-07-01T21:00:00Z" }, { "$date": "2018-07-02T21:00:00Z" }, { "$date": "2018-07-03T21:00:00Z" } ], "default": "na" } } ]}Apply the @time_range directive
Note that the boundaries in the code example above are given in UTC time. In most cases, this will differ from what they would look like in the user's local time. In our example, the user time zone is 3 hours ahead of UTC+0, that is why a day start is 3 hours into the previous day in UTC format.
To generate these boundaries by hand is neither convenient, nor appropriate because they have to be generated on the basis of the time range selected in the calendar widget.
Therefore, we will use the @time_range directive. This is a new Bosch IoT Insights custom directive that loops over a given time range with a certain step (e.g. a day).
See below an excerpt from our @time_range documentation:
Provides an implementation of a time-range FreeMarker directive:
<@time_range from='2020-01-05T22:00:00Z' to='2020-01-07T22:00:00Z' step=86400; time>
${time}
</@time_range>
The directive takes three input parameters, namely from, to, and step, and a user-defined loop variable (e.g., time in the example above).
The from and to parameters must be strings in ISO_INSTANT format. The step parameter must be an integer representing seconds.
The directive loops from from.getEpochSecond() to to.getEpochSecond(), inclusive if the difference is evenly divisible by the step.
The loop condition is:
for (long time = fromSeconds; time < toSeconds + step; time += step)
If a loop variable is specified, it will be assigned a string, formatted by using ISO_INSTANT at each step.
This would be the output of the example above:
2020-01-05T22:00:00Z
2020-01-06T22:00:00Z
2020-01-07T22:00:00Z
With this directive, our timeRange facet stage would look like this:
"$facet": { timeRange: [ { $bucket: { groupBy: "$timestamp", boundaries: [ <@time_range from=timeRange.from to=timeRange.to step=86400; day> { "$date": "${day}" }, </@time_range> ], default: "na" } } ]}Create the full query
Now, we can create the full facet-related query. In the Template Designer of the facet search query template, just add the $facet stage for the two parameters right after the $match stage.
The the final query would look like this:
No facet stage for the value parameter
Please note, that we have not added a facet stage for the value parameter but the query still contains a filter for this parameter.
It is important to keep the value parameter in the query because the filter widget also has it and we still want to use it for filtering purposes.
Apply the _caller parameter
The query defined so far has a few limitations. They are described below along with the recommended solutions.
Let's say that in the filter, you have selected a single flat, e.g. Flat 2, and a certain time range, e.g. 2018-07-01T21:00:00Z - 2018-07-02T21:00:00Z. Normally, in this case you would see the facet information (number of matching entries) only for that selection, i.e. Flat 2.
However, you may want to see the facet information (number of matching entries) about the other options in this filter too (i.e. Flat 1 and Flat 3) for the selected time range, as illustrated on the following screenshot:
Technically, it means that when you request facet information for a certain parameter, you will ignore the current filter selection (i.e. the selection within the flats filter) but you will apply all other filters (e.g. the selection in the time range filter).
To fulfill that use case, we have defined a new input parameter which can be added to the facet search query template, namely the _caller parameter.
_caller is a system parameter with data type STRING and parameter type SCALAR which can be added as a facet search query template parameters. It is populated by the filter widget and indicates which of the filters is currently applied and is therefore requesting the facet information. The _caller parameter allows us to ignore the selection made in the filter which is calling the facet data.
See how the parameter looks in the Template designer of a facet search query template:
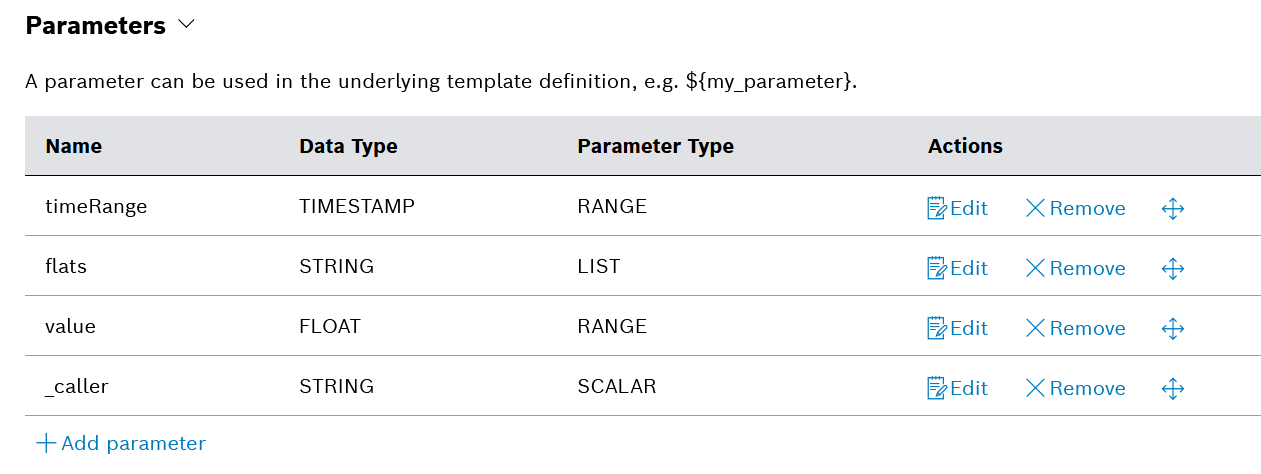
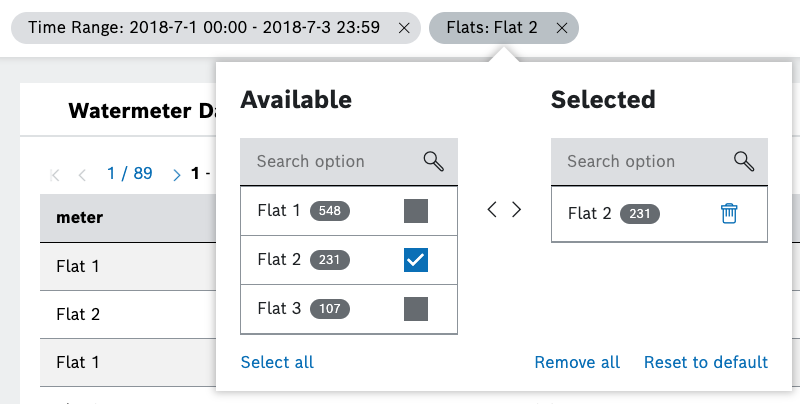
On a dashboard, the value of the _caller parameter will be the currently selected filter, as for example on the screenshot below this is the Flats filter:
When the _caller parameter is applied, the query will return the entire facet information with regard to this filter, regardless of the selected option(s) in it. As you can see on the example of the screenshot above, the facet information (number of matching entries) is displayed also for the non-selected options.
The final query looks like this:
Please, note that there is not a _caller check for the value condition, and the value is always included in the filter when present. This is because we are not generating facet information for the value condition.
The timeRange is not excluded from the filter when the _caller is timeRange. The reason is that the time range is treated differently for better efficiency, as explained below.
When the calendar widget is displayed in the filter (see screenshot below), the frontend will pass to the facet query the displayed range (e.g. two months), and not just the range that is selected in the filter (e.g. three days), and not a bigger range than the one displayed on the UI.
The time range condition should always be applied in order to limit the data to the time range displayed on the UI, in contrast to other filter parameters conditions.
Designed in this way, the query will return a different result depending on the caller.
Consider the examples below with the following filter parameters:
|
Parameter |
Value |
|
timeRange |
2018-07-01 00:00 to 2018-07-03 23:59 |
|
flats |
Flat 1 |
|
value |
0 - 6 |
Response when the caller is timeRange
Alternatively, if the caller is timeRange, the response would be:
[ { "timeRange": [ { "_id": "2018-06-30T21:00:00.000Z", "count": 166 }, { "_id": "2018-07-01T21:00:00.000Z", "count": 167 }, { "_id": "2018-07-02T21:00:00.000Z", "count": 146 } ] }]Response when the caller is flats
When the caller is flats, the response is the following:
[ { "flats": [ { "_id": "Flat 1", "count": 479 }, { "_id": "Flat 2", "count": 223 }, { "_id": "Flat 3", "count": 102 } ] }]