In this tutorial, you will learn how to set up the faceted search step by step. This involves different UI menus, therefore we have collected the story line in one place for your convenience.
Faceted search output
With faceted search, you can search for values in relation to each other and see the number of matching records for each of the available filters.
On a dashboard with a filter widget, faceted search would look like this for example in the calendar view:
And like this for example in a selection view:
Data upload
If you are just starting with your project and do not have any data available in it, you can upload a sample data set manually.
We will illustrate the process with the watermeter_201807.zip data set which was offered in the Getting started guide > Uploading data.
It contains measurement data related to the water consumption by several flats in a building. The smart water meters have reported the data with a flat ID, a value, and a timestamp for each measurement.
Proceed as follows:
- Download the example data set on your local machine and extract it.
- Then, upload the extracted json file as follows:
- On the left navigation, go to Processing > Data upload and click Select Files.
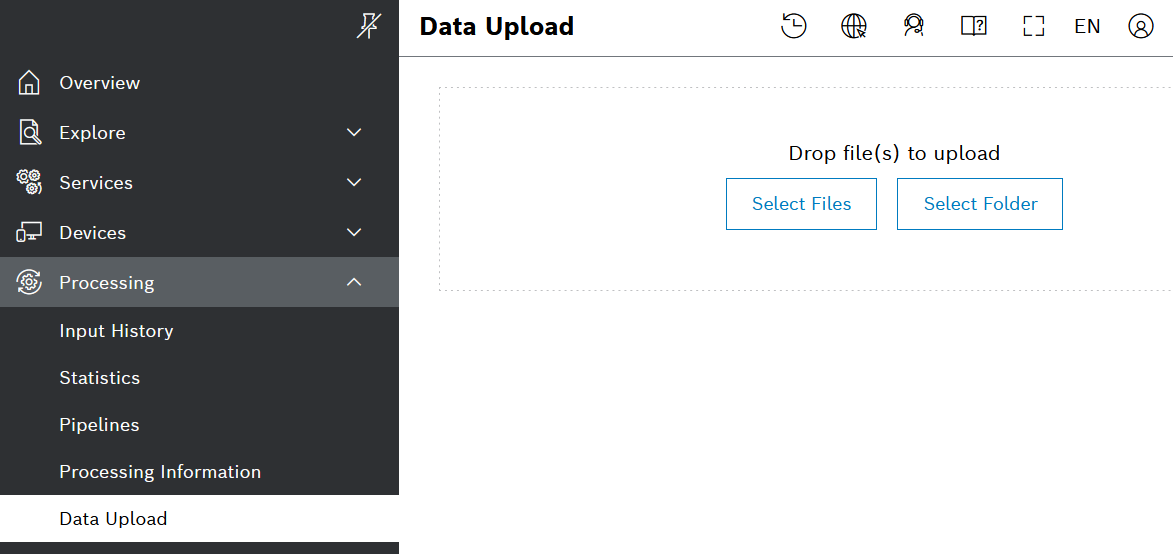
- Select the extracted example data set from your local machine.
- Fill in the Predefined Metadata fields with values of your choice and click
 Upload file on the bottom.
→ The UI will inform that the Processing was successful.
- On the left navigation, go to Processing > Data upload and click Select Files.
Query template
A prerequisite for faceted search is a properly defined query template.
Such a query template can be used in filter widgets only and will return the available filters along with the number of matching results. This will allow you to make a more informed selection in the filter widget.
For comparison, a regular query template will return the results themselves. You can use it for example in a table widget to see the actually filtered results displayed.
In addition to the components of a regular query template, a template for faceted search requires:
- the facet stage for each parameter of the query template, as well as
- a caller parameter, which indicates the current filter calling for the facet information, and
- a timezone parameter, which reflects the Daylight Saving Time (DST) boundaries.
Create a regular query template
Later, you will use this query template as a data source of the table widget. As it is simpler to configure, we will start with it.
Proceed as follows:
- On the left navigation, go to Explore > Data Explorer and click
 Add Query Template in the top right area.
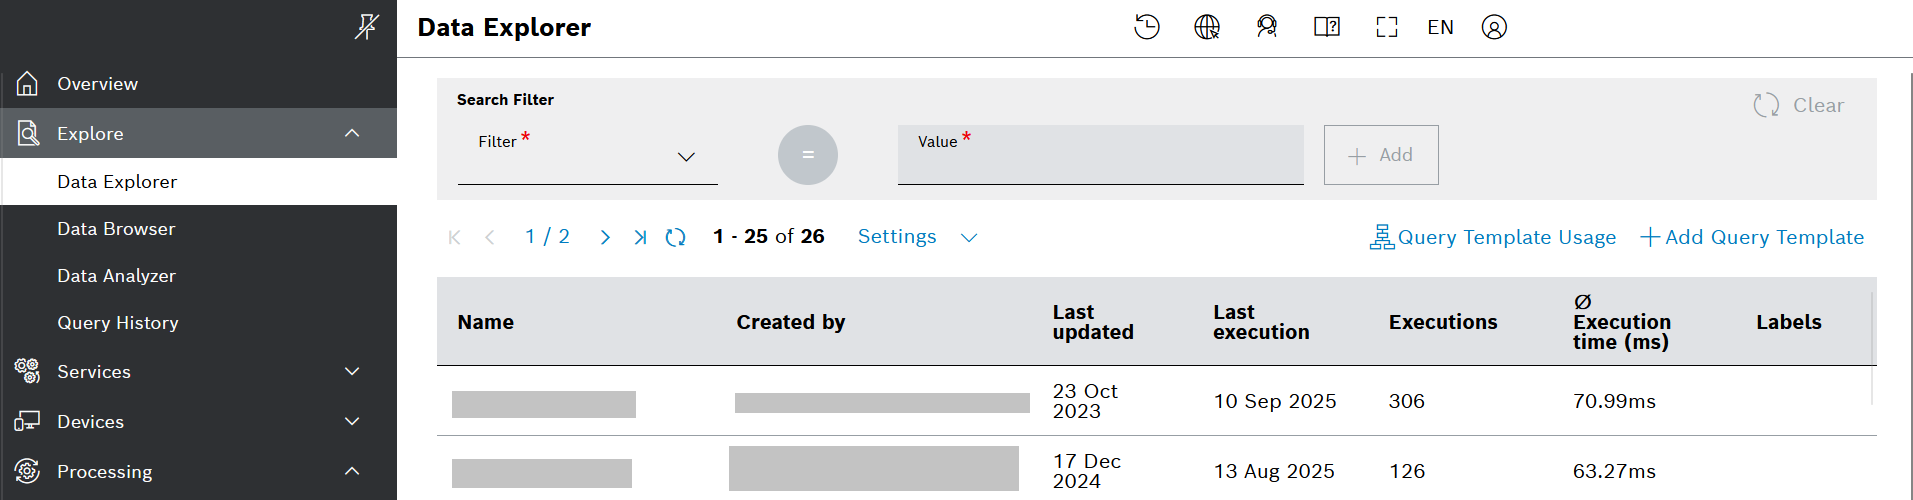
- In the Details tab that opens:
- Add a Name which will help you recognize the template later on, for example Watermeter data - regular template.
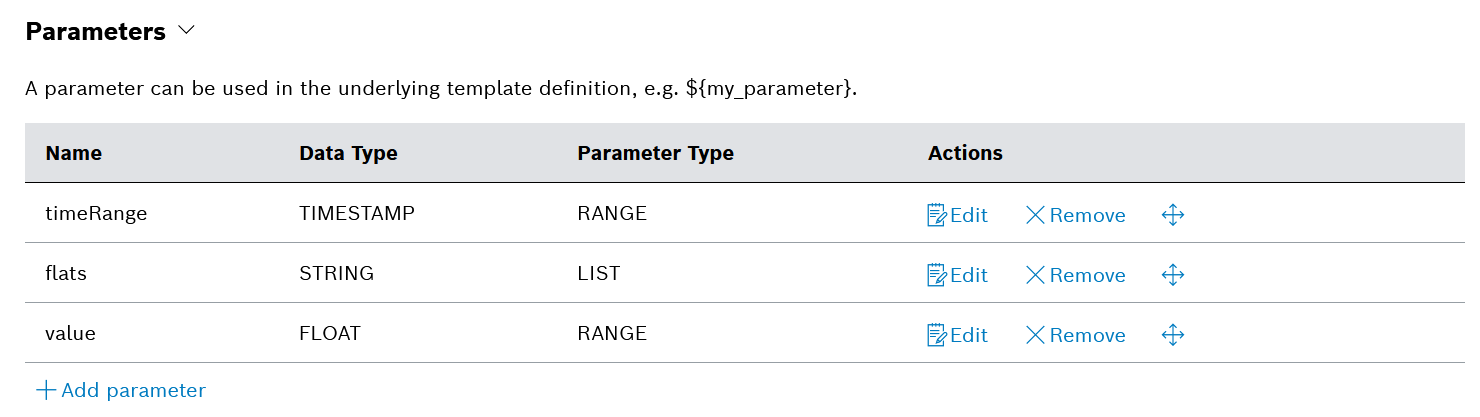
- In the Parameters tab, click Add parameter for each parameter and add the following parameters, marking them as Optional:→ The parameters should look like this:
Technical Name
Data Type
Parameter Type
timeRange
TIMESTAMP
RANGE
flats
STRING
LIST
value
FLOAT
RANGE
- In the Template Definition section, enter the following query:
To understand how the query definition is designed, refer to Examples > Query templates: Faceted search.
- Click the Save Changes button.
To test the query directly within the Template Designer, enter some values for the parameters and click the Run (cached) button:
Keep in mind that all the sample data here falls within the time range from 2018-07-01 00:00 to 2018-08-31 23:59.
Therefore you need to set the
timeRangeparameter accordingly. After selecting the respective dates, do not forget to click the Apply button under the selection.
Create a facet search query template
Later, you will use this query template as a data source of the filter widget.
You can start creating a new query template from scratch or, to save time, you can also click the Duplicate Template button in the previous template that we created above and make the relevant adjustments as described below, then save it as a new template. Here we will show the process from scratch.
Proceed as follows:
- On the left navigation, go to Explore > Data Explorer and click Add Query Template in the top right area.
- In the Template Designer view that opens:
- Add a Name which will help you recognize the template later on, for example Query template for facet search - Watermeter data.
- In the Parameters section, click Add parameter for each parameter and add the following parameters, marking them as Optional:
Technical Name
Data Type
Parameter Type
timeRange
TIMESTAMP
RANGE
flats
STRING
LIST
value
FLOAT
RANGE
_caller
STRING
SCALAR
_timezone
STRING
SCALAR
→ The parameters should look like this: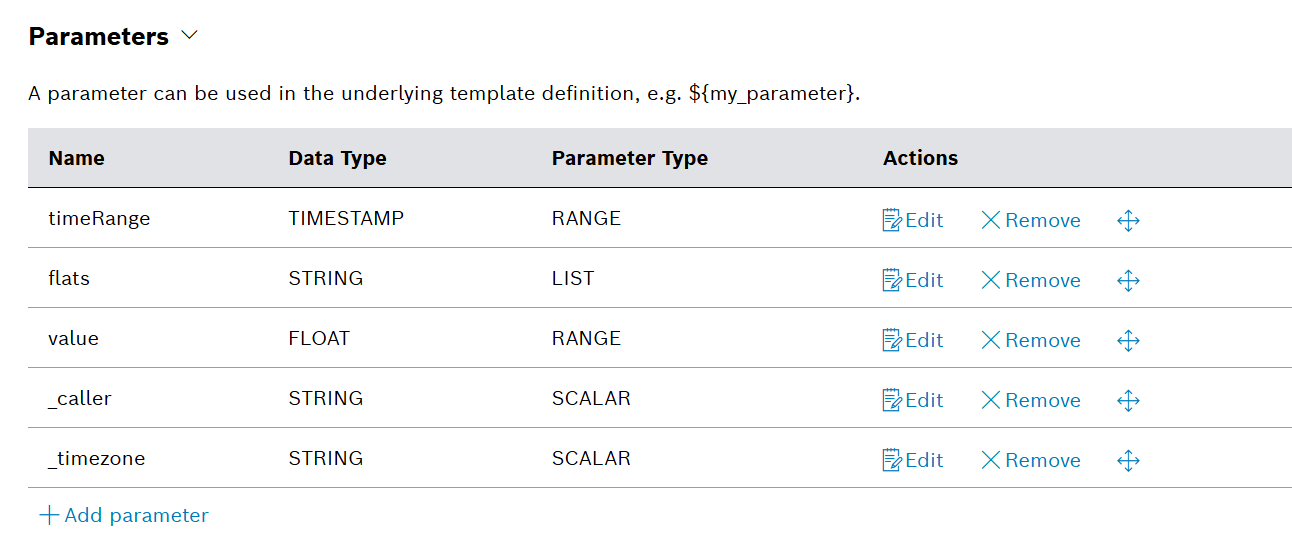
- In the Template Definition section, enter the following query:
To understand how the query definition is designed, refer to Examples > Query templates: Faceted search.
Click the Save Changes button.
To test the query directly within the Template Designer, enter some values for the parameters and click the Run (cached) button:
Keep in mind that all the sample data here falls within the time range from 2018-07-01 00:00 to 2018-08-31 23:59.
Therefore you need to set the
timeRangeparameter accordingly. After selecting the respective dates, do not forget to click the Apply button under the selection.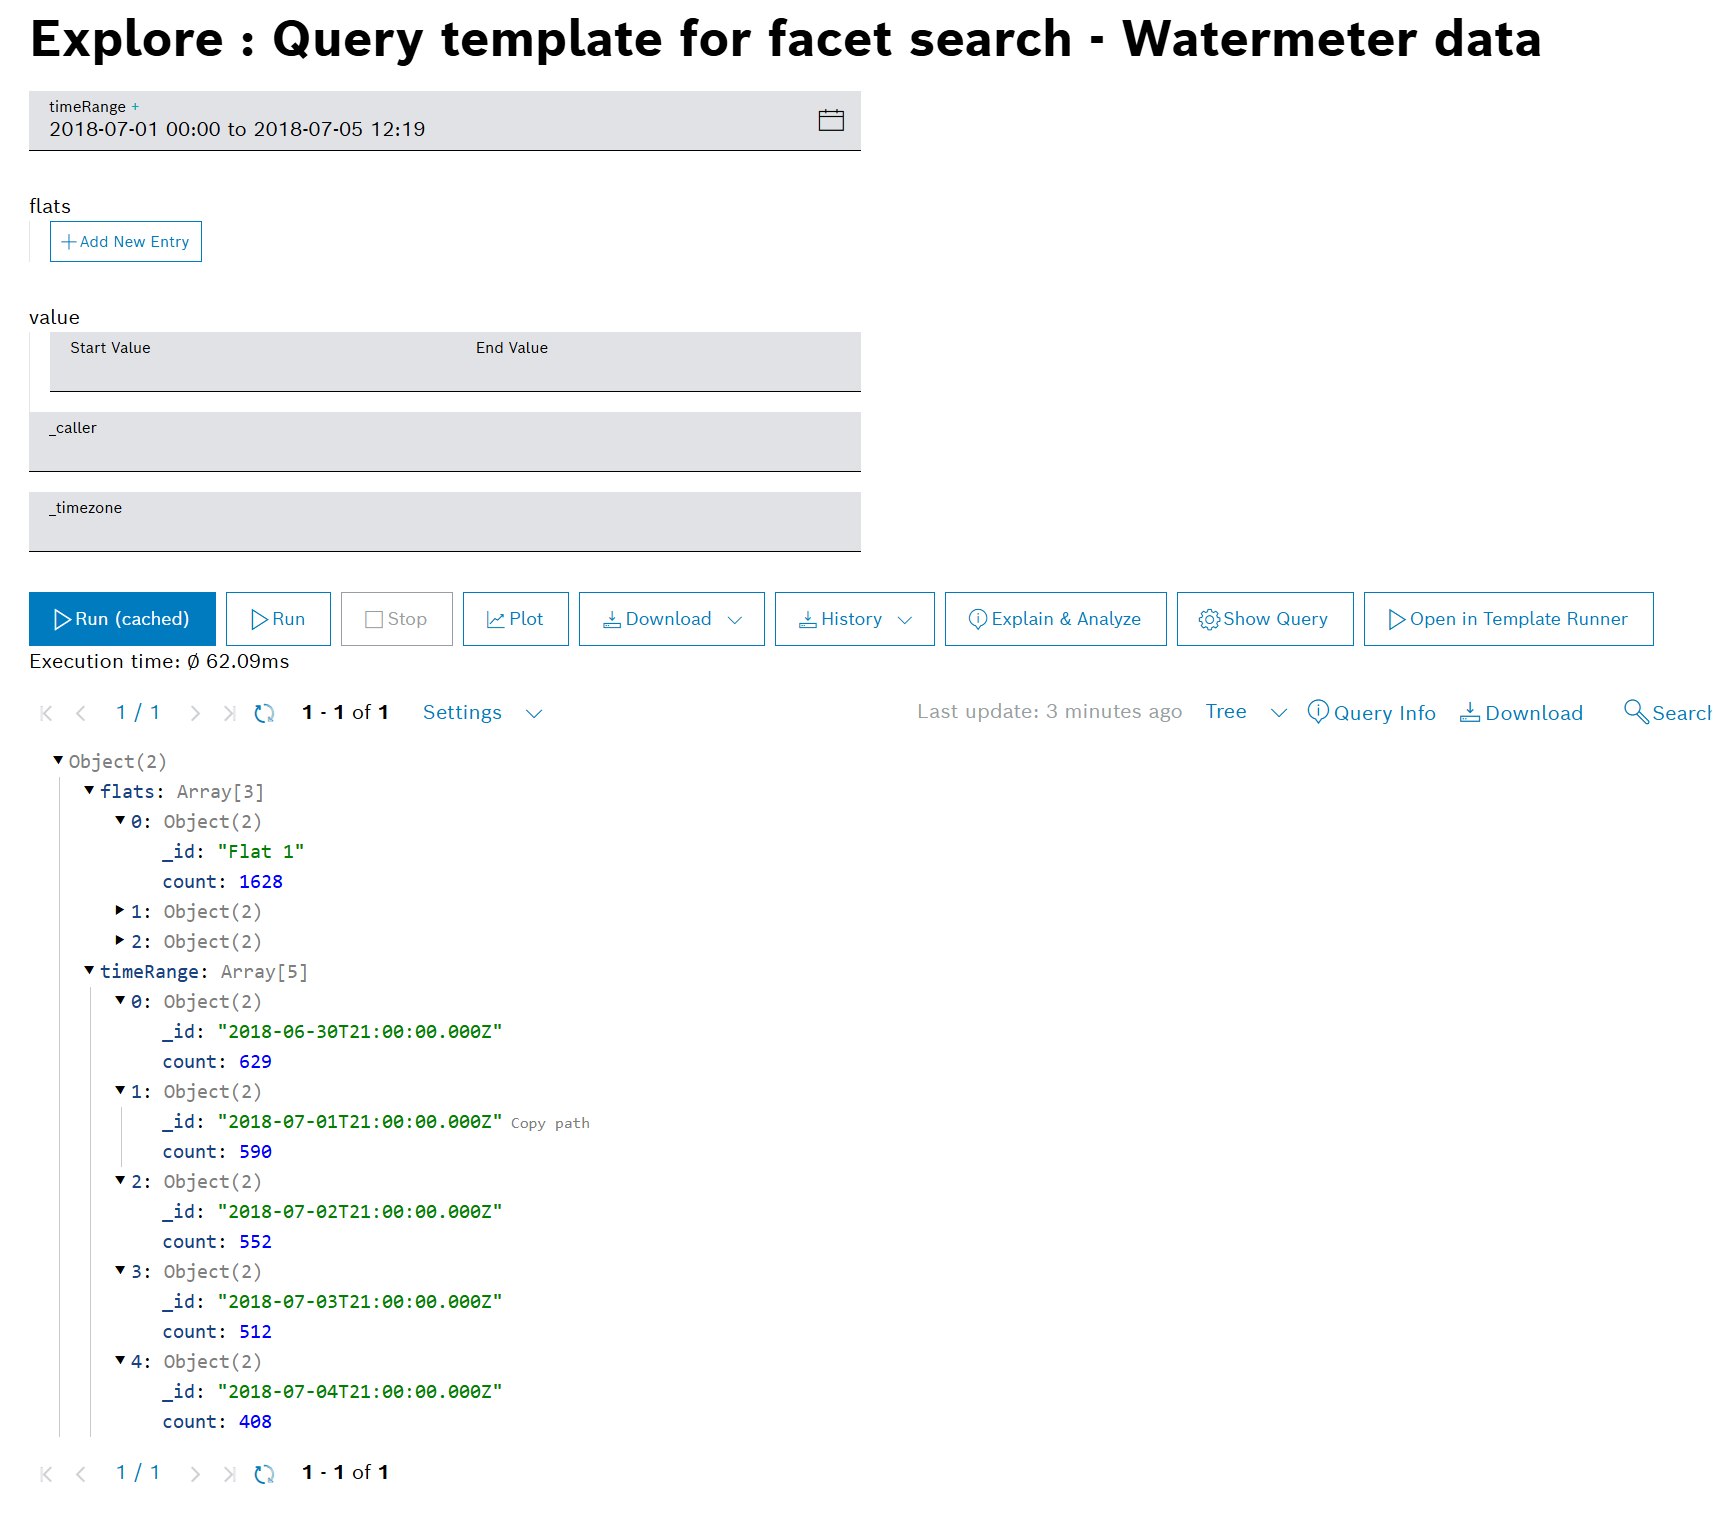
Filter widget
Let's add a filter widget, whose data source will be the newly created facet search query template, and let's define the facet search fields.
Proceed as follows:
- Expand the dashboard options menu and select the Add widget option.
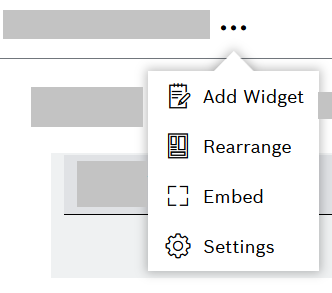
- Then out of the available widget types, select Filter widget.
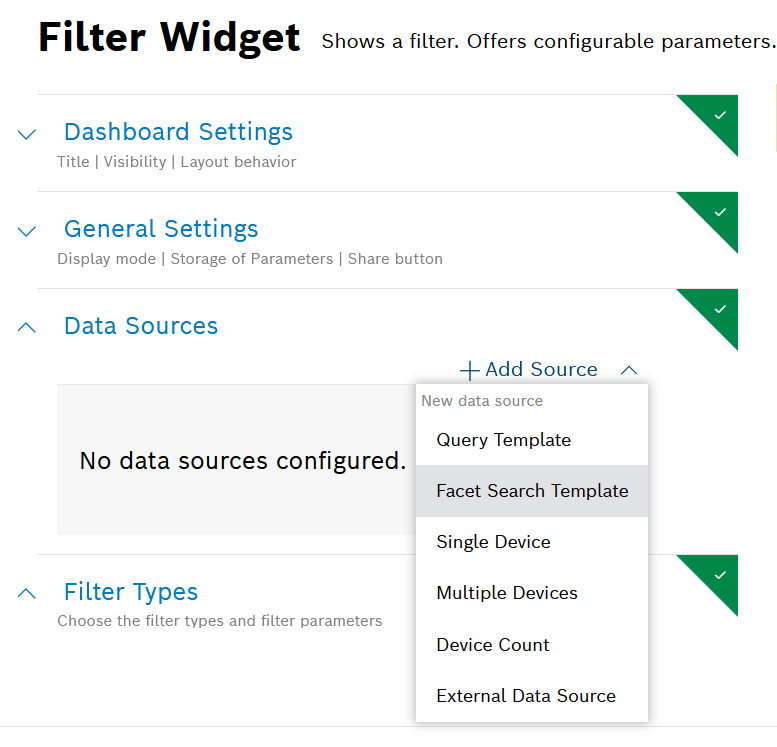
- In the filter widget configuration editor that opens, add a data source as follows:
- Expand the Data Sources section, click Add Source and select the Facet Search Template option.
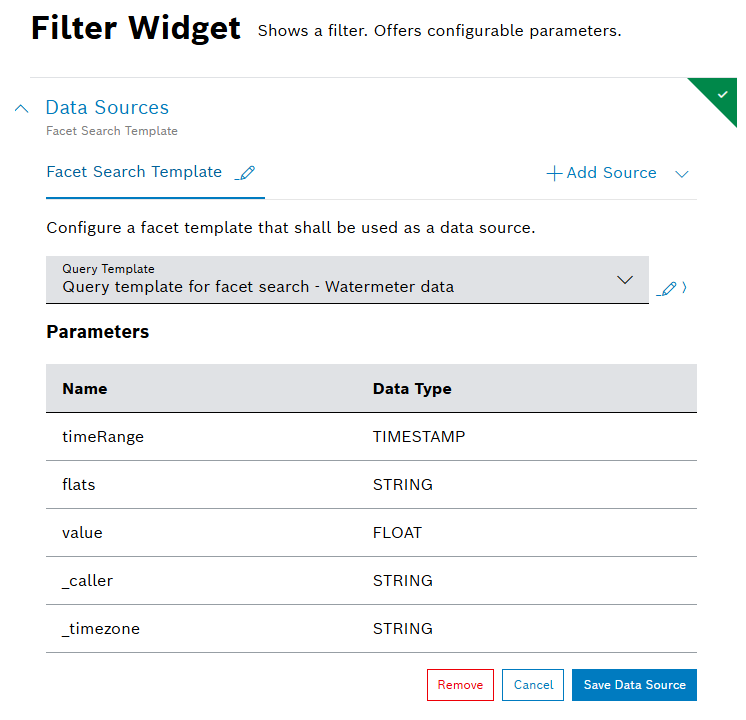
- In the Query Template field, select the query template which you created earlier and click Save Data Source.
- Expand the Filter Types section and activate the General filters toggle.
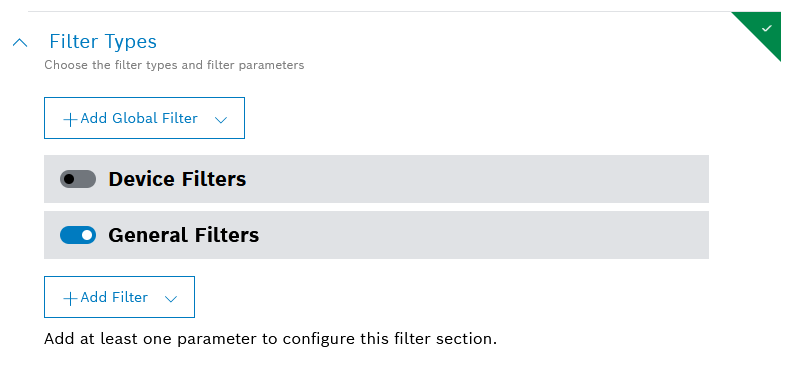
- Click the Add Filter button and choose the respective option for each filter that you are going to add:
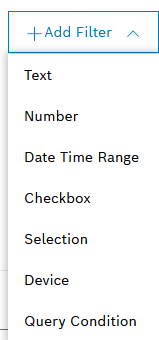
- Add a Date Time Range filter type with filter name Time Range and technical name timeRange.
- Expand its Advanced Settings section and activate the checkbox for Facet search field.
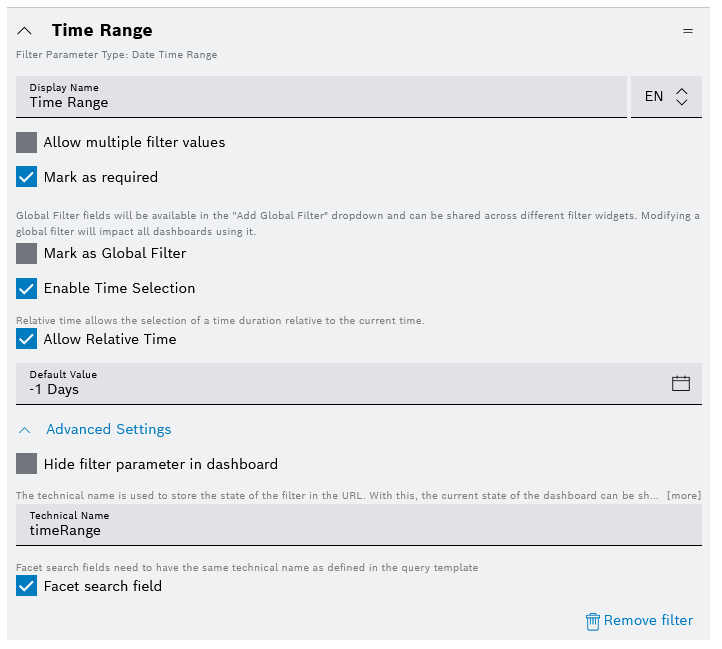
- From the dropdown list of the Facet query parameter field, select which query parameter delivers the facet counts for this field. The default parameter is the one from the Technical Name field above.
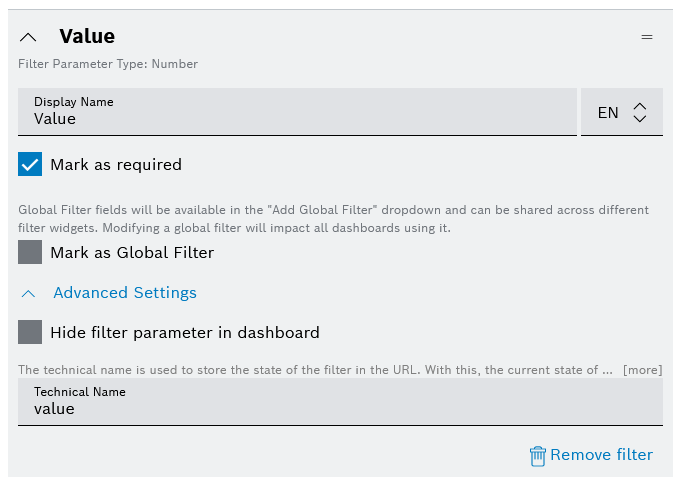
- Add a Number filter type with filter name Value and technical name value.
- Add a Selection filter type with filter name Flats, technical name: flats, and an additional option: Allow multiple filter values.
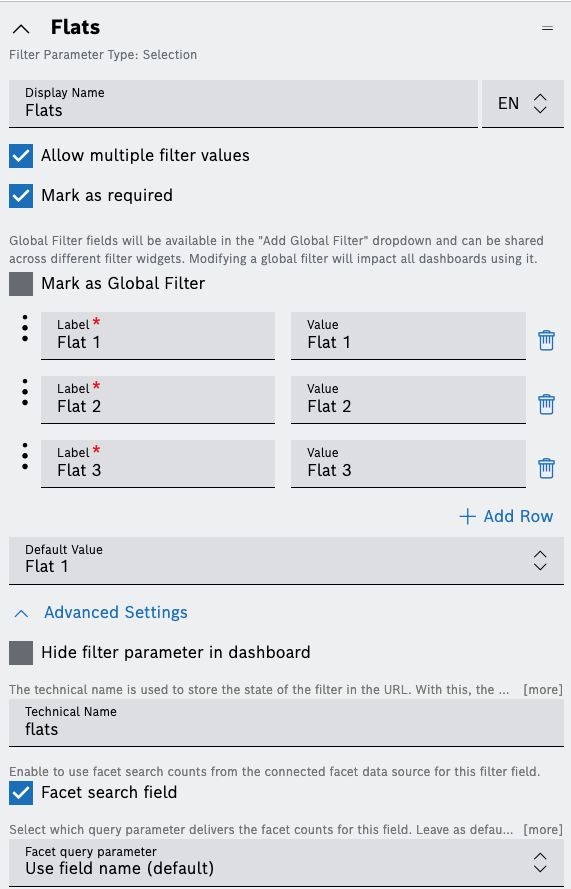
- From the dropdown list of the Facet query parameter field, select which query parameter delivers the facet counts for this field. The default parameter is the one from the Technical Name field above.
- Click Add Row for example three times (or more) and add a Label and a Value for each of the flats to be displayed as filter selection options.
- Expand its Advanced Settings section and activate the checkbox for Facet search field.
- Keep in mind that if the value which you can see in the Technical name field of each filter is not the same as the Technical name of the parameter in the query template, you have to use the dropdown list from the Facet query parameter field to link it explicitly.
- Expand the Data Sources section, click
- When ready with all general filters, click the Add button on the bottom to add the filter widget to the dashboard.
Table widget
Now create a table widget on the same dashboard to display the data of interest.
Proceed as follows:
- Expand the dashboard options menu and select the Add widget option.
- Then out of the available widget types, select Table widget.
- In the widget configuration editor that opens, configure the Data Sources section as follows:
- Select the data source option Query Template and then select the regular query template which you created earlier in this tutorial especially for this purpose.
- For each of the Parameters of the data source, add the Available references from Filter Widget.
To do that, clicking icon on the right of the row and from the menu that opens, select the corresponding filter which was created earlier in the filter widget.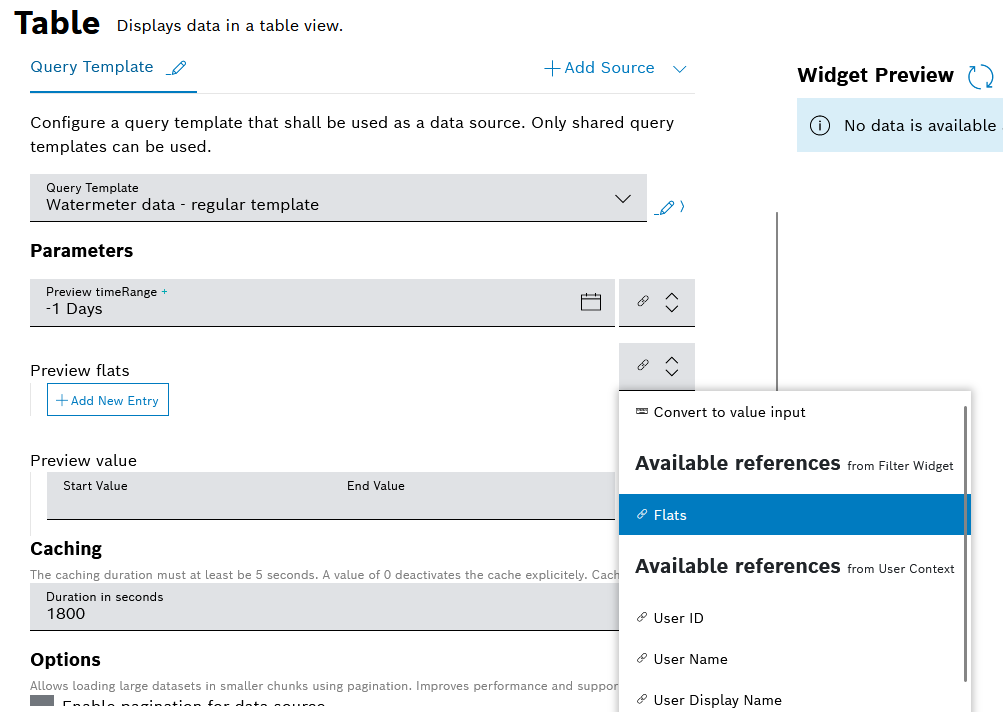
- When ready, click the Save Data Source button.
- Configure the rest of the settings as needed, and click the Add button on the bottom to add the widget to the dashboard.
→ The table should look like this and it should be possible to filter the table rows by means of the filter widget: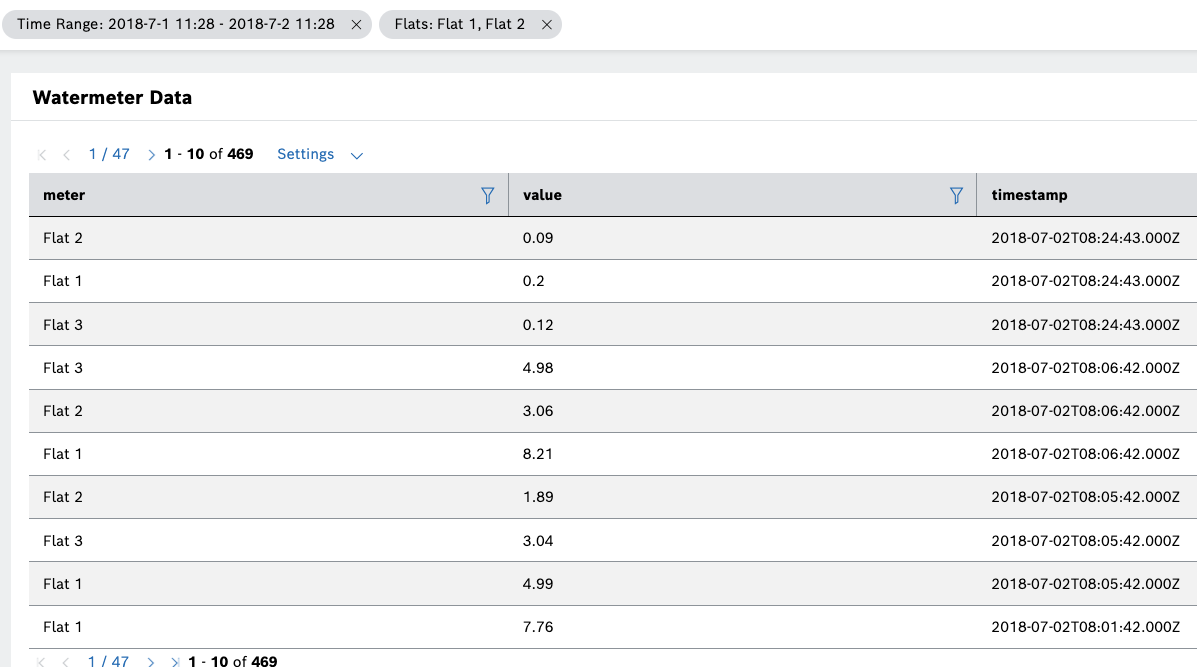
Filter the table data
Now that the facet search is enabled, this is how the filters and the numbers of matching results will look like in the filter widget itself:
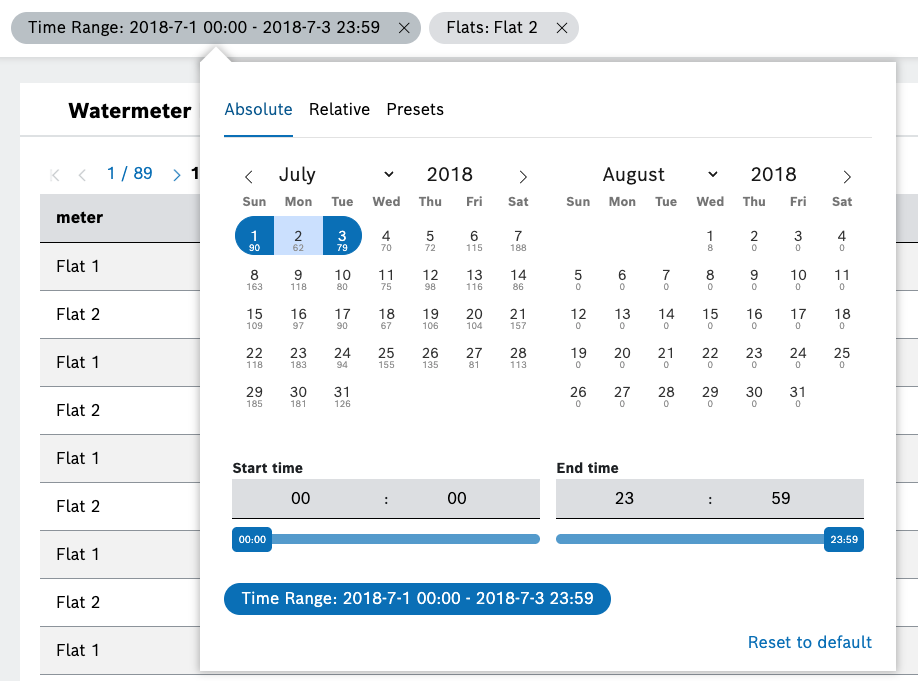
Time Range filter
In the Absolute view of the Data Time Range filter type, for example, you will see the number of reported measurements under the calendar date.
The numbers are dynamic depending on the selection in the other filter (flats) as well.
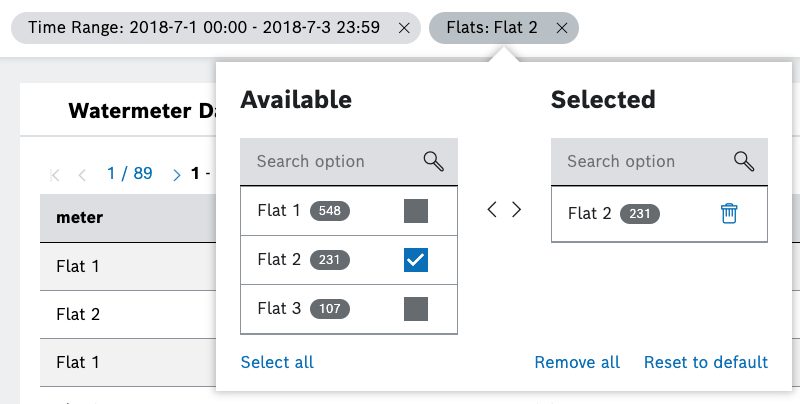
Flats filter