The Event Notifications guide elaborates on the following topics:
The Event Notifications menu allows you to configure personal notifications for various events.
When such an event occurs, there will be a number on the notification bell icon on the header bar, and further details will be shown in the related menu. How to configure such notifications is explained below.
Here you will only learn how to configure notifications for yourself. If you are an Admin and want to configure notifications for multiple users in your project, refer to Event Service.
Proceed as follows
- On the left navigation, go to Services > Event Notifications.
→ The list of available events of which you can choose to be notified is displayed by default.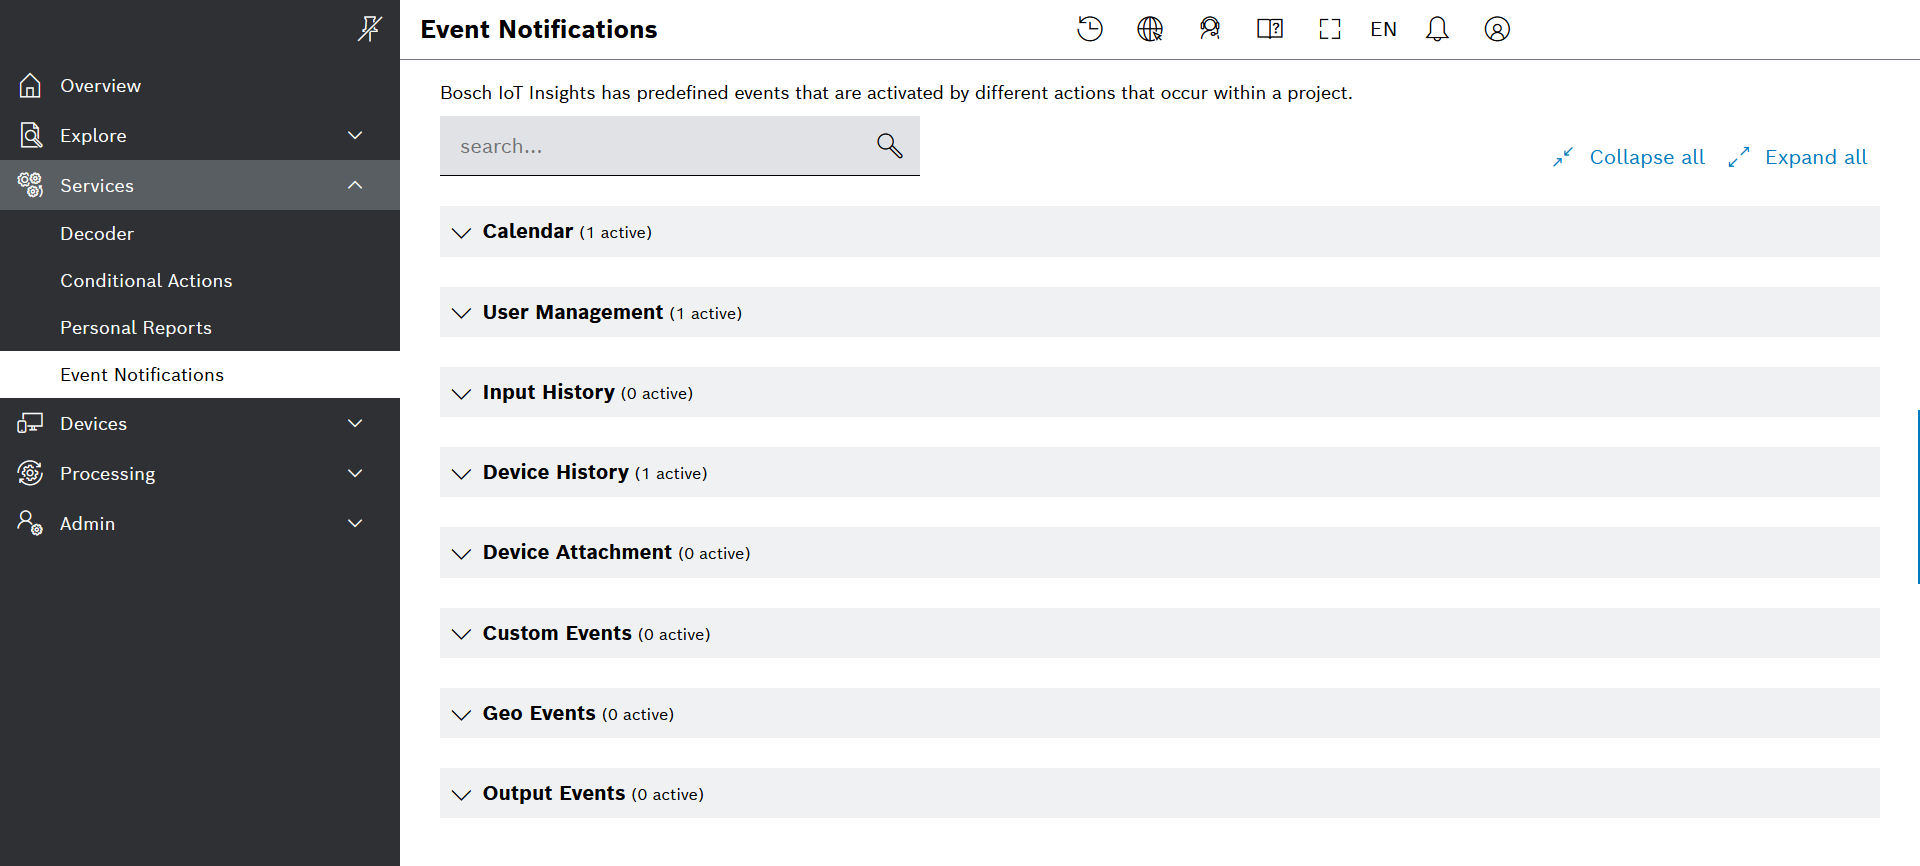
- Use the arrows on the left to expand and collapse each event group in order to find the event of interest:
- You will see various groups of System Events, such as Calendar, User Management, Geo Events, Output Events, etc.
These are events defined by the backend. In particular, Geo Events and Output Events are defined by a processing pipeline with the respective configurations.
- In addition, you will find the group of Custom Events.
This group lists all events which have been defined in the Event Service menu as described in Adding a custom event definition.
- You will see various groups of System Events, such as Calendar, User Management, Geo Events, Output Events, etc.
- Use the search bar on top of the list for faster navigation to the event of interest.
See for example the search results for events that contain the word user:
Creating a personal notification
- Expand the event group of interest or use the search bar to navigate faster to the relevant event.
- Activate the checkbox of the event(s) of which you would like to be notified (see screenshot above).
→ The Notification tag is added by default.
→ The system automatically creates a subscription for you regarding the selected event(s).
→ Your notification is created with the default settings, which you can further adjust as described below.
Configuring a personal notification
- On the right of the event of interest, click the
 edit icon to customize the notification settings (see the screenshot above).
 - On the screen that opens, proceed as follows:
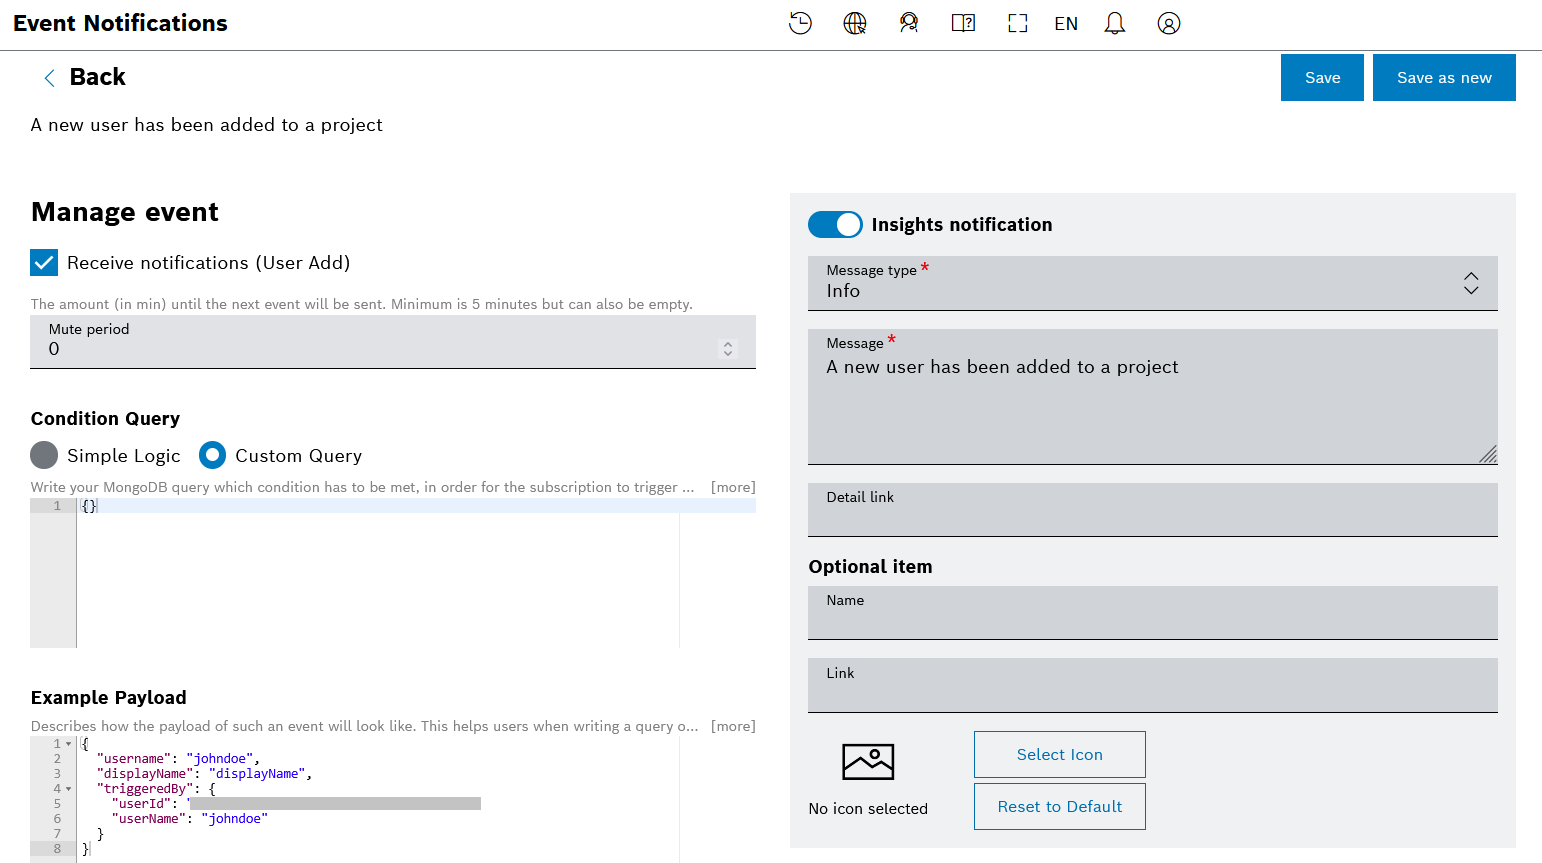
- Activate or deactivate the Receive notifications checkbox, as needed.
- In the Mute period field, define a period (keep empty or select minimum 5 minutes) in which you do not want to receive notifications. In such a case, the notifications will only be delayed but not skipped.
- In the Condition Query area, you can further filter the events for which you will be notified.
- Choose between Simple Logic and Custom Query:
- For Simple Logic, select a Path from the drop-down list, choose an Operator and a Data Type, and enter a Value.
Then, click the Add button to apply the condition.
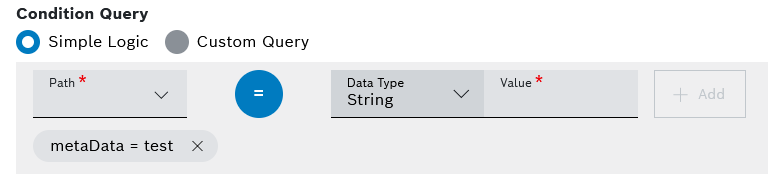
- For Custom Query, write a MongoDB query whose condition must be met in order for the system to trigger the defined action(s).
You can use the example which is automatically provided by the system in the Example Payload field for the selected event type.
- For Simple Logic, select a Path from the drop-down list, choose an Operator and a Data Type, and enter a Value.
- Choose between Simple Logic and Custom Query:
- In the Example Payload area, you will find an example of the query specific for the selected event type.
- In the right column, the Insights notification toggle is activated by default.
- In the Message type field, select the relevant category:
- Info - this is the standard category, marked with a blue ribbon on the notifications list
- Warning - this is the medium category, marked with an orange ribbon on the notifications list
- Error - this is the highest category, marked with a red ribbon on the notifications list
- In the Message field, there is normally a default message for the selected event type, which you can further customize as needed.
You can use placeholders based on the parameters from the Example payload.
- In the Detail link field, enter a url which can be clicked from the notification for further details.
You can use placeholders based on the parameters from the Example payload.
- In the Optional item area, you can further define:
- a Name,
- a Link, and
- an Icon
See for example how such a notification would look like on the screenshot below.
Test buttons are supported for all subscription actions based on the current configuration. Use the following buttons for validating the configuration:
 Send Test E-Mail button sends the actual E-Mail
- Send Test HTTP-Request button sends the actual REST request
- Send Test Notification button creates the actual notification:
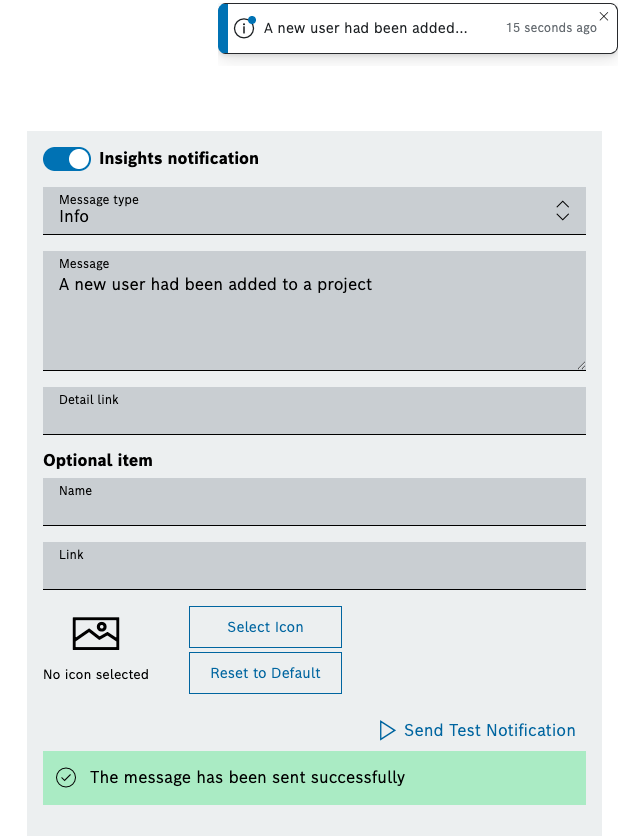
The status appears below the button showing the loading status and the result status or error.
- In the Message type field, select the relevant category:
- Activate the E-Mail toggle, if you want to receive additional notifications by email, then enter a Subject and a Message.
- Activate the HTTP toggle, if you want to receive notifications in the form of rest calls.
- Then, configure the following fields:
- Select an HTTP method.
- In the Request URL field, enter the URL of the request.
- In the Body tab, proceed as follows:
- In the Body Type field, select the relevant body type: Raw Data, Form Data, or Document.
The Body type option allows you to specify the format of the request body when making requests to the REST API. It is not available for the GET and DELETE HTTP methods.
For Raw Data, enter the request body in the Data field.
- For Form Data, enter a key-value pair.
- For Document, the system will send the matched document (defined in the data source) to the HTTP endpoint.
- In the Body Type field, select the relevant body type: Raw Data, Form Data, or Document.
- In the Headers tab, proceed as follows:
- Click the + Add Header button for each header row that you wish to add.
- Enter a Header and a Value.
- To remove a header, use the
 Remove icon on its row.
- In the Authorization type field, specify the type of authorization to be used when making requests to the REST API.
Select one of the following available options:- The default option is Without Authentication.
- For Basic Auth:
- Click the + Set Configuration button.
→ The configuration dialog will open. - In the Username field, enter the username.
- In the Password field, enter the password.
- Confirm with Save.
- Click the + Set Configuration button.
- For OAuth 2.0:
- Click the + Set Configuration button.
→ The configuration dialog will open. - In the Grant Type drop-down list, select the type of credentials, namely Client Credentials or Password Credentials.
- Enter the Access Token URL.
- Enter the Client ID.
- Enter the Client Secret.
- If you selected Password Credentials as Grant Type, also enter the Username and the Password.
- In the Scope field, enter the scope.
- Confirm with Save.
- Click the + Set Configuration button.
- For OAuth 2.0 Bearer Token,
- Click the + Set Configuration button.
→ The configuration dialog will open. - Enter the token.
- Confirm with Save.
- Click the + Set Configuration button.
- For Current User Session, be aware that this option only works for service domains that belong to the current project and not 3rd party applications.
- In the Retry Count field, define how many times the system will attempt the REST call again if it fails.
- Finally, in the top right area, click the Save button to save the changes to the current event notification, or click the Save as new button to save the changes in a new notification configuration.
- Then, configure the following fields:
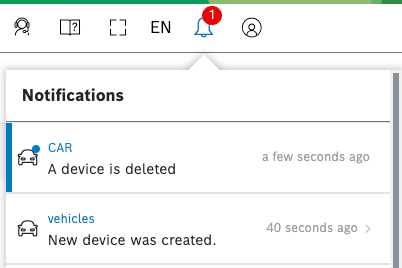
Checking for notifications
- Check the notification bell on the header bar. The notifications are automatically refreshed every 30 seconds.
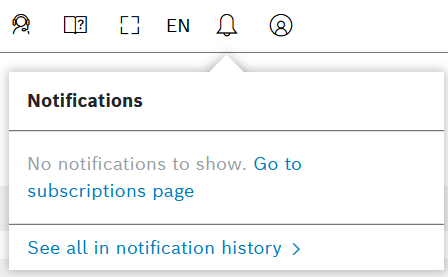
- Any new notifications will be displayed as a number in a red circle.
- Click the bell to open the menu which offers a list of notifications.
- The unread notifications will have a color ribbon on the left depending on their category (blue, orange, and red, respectively for info, warning, and error).
- On the list, click the hyperlink of the respective notification to see more details about it.
- At the end of the list, click the hyperlink See all in notification history, to reach older notifications.
Deactivating a personal notification
- To deactivate a personal notification, simply deactivate the checkbox which you activated earlier in order to create the notification.
→ The system will no longer send you notifications, but the event subscription in the background will not be deleted, only deactivated.